Thursday 26 April 2018

As Time Moves On ( Australia )

Morning all.

I decided to complete another layout incorporating the April Kaisercraft colour palette challenge.
This time I have used a few different collections from Kaisercraft. I hope you like it.


PRODUCTS USED:

Kaisercraft "Outdoor Trail" -  Bush.
Kaisercraft "Pen and Ink". "Ephemera", "Wallpaper" "Pen and Ink Layered"
Kaisercraft "Timeless" . "Butterflies"

Collectables  from Kaisercraft "Pen and Ink", "Antique Bazaar" and "Timeless".
Sticker Sheet from Kaisercraft  "Pen and Ink" and "Timeless".
Fiskars punch.

CUTTING:

Cut "Ephemera"  reverse leaving the salvage intact to 10" x 10". Punching left and right hand side with Fiskars border punch.
Cut "Wallpaper to 6" x 9.5". Punching right hand side with boarder punch.
Cut another piece from "Wallpaper"  6.5" x 3.5"
Cut postcard from "Butterflies"  reverse to use as photo mat. Leaving numbers from salvage intact.
Fussy cut butterflies from "Wallpaper" reverse and a small spray of flowers from"Pen and Ink Layered" reversed.

PUTTING IT TOGETHER:

Added "Ephemera" to "Bush"  using double sided tape, 1" from the top and 1" from left hand side. Using foam tape added "Wallpaper" 3" from the left hand side and 1" from top. With the second piece of "Wallpaper"  I placed using foam tape 4.5" from left hand side and 2.5" from the top.
Added photo to mat with foam dots and added mat to page, 5" from top  and 4.5" from left hand side.

EMBELLISHMENT:

Added lace strip from the sticker sheet across "Wallpaper ". Added title using letter from the sticker sheet. Then added butterflies to the left hand side of "Ephemera"
Using a mixture of collectables, clocks, fussy cut flower cluster and butterflies from the sticker sheet. The I clustered these at the top left hand side of photo using foam dots.
Added clocks as postage stamps on postcard  and placing further butterflies around page. Added journal tag to underneath photo mat.

Tuesday 24 April 2018

London time - Sketchy Board Facebook challenge

Afternoon all.

Getting near the end of the month, Just a few more layouts to create.

Sketchy board challenge, and was use yellow and orange to with the sketch provided.


PRODUCTS USED :

Yellow and Orange card stock.
"Greenery" reverse from Kaisercraft Golden Grove collection.
A row of Fob watches from Kaisercraft "Storyteller" sticker sheet. The words "London and Time"  from Kaisercraft "Floral Delight" sticker sheet . Wording "This is what it is all about" and Smiley faces are from Kaisercraft "Day Dreamer" sticker sheet.
Used orange flower Brad from stash.
The yellow Quatdrefoil background dye is from Paper Roses.
The Fob watch dye, the arrow dyes are from Kaisercraft.
The flower corner boarder dye is from Joanne Sheen.

CUTTING :

Cut 1" from top and left hand side of the Greenery paper.
Cut a 10" square from the middle of the yellow card stock, this will be used to cut other pieces.
Cut two circles one 7" in orange card stock and a 6.5" in pale yellow card stock.
Dye cut 4 corners in orange card stock.
Dye cut Fob watch in yellow card stock with hands out of orange card stock.
Dye cut Quatrefoil background out of yellow card stock.
Dye cut arrows from yellow and orange card stock.

PUTTING IT TOGETHER :

Added the cut piece of "Greenery", 1/2" from the top and 1/2" from left hand side with double sided tape.
Added the four orange corners to the edge of the "Greenery" paper with glue.
Place lemon circle over the orange circle with foam dots, then affix with foam dots to the "Greenery" paper 2.5" from the top and 3.5" from the left hand side.
Added Fob watch, tucking the top at an angle to the lemon circle adding orange hands with orange flower brad.
Place the clock stickers across the middle of the circles. Place the Quatrefoil dye cut 1.75" from top of the circle and 1" in from the outer edge of the orange circle.
Place two photos 2.25" x 3.75",  1" from top of outer circle and 4.25" from outer edge of circle on left hand side.
Added wording, arrows and smiley faces.

Monday 23 April 2018

Let your Dreams take flight

Morning all,

Today's layout is the second challenge for "Let's get Sketchy."


PRODUCTS USED:

Papers are "Garden Party"  by "Dovecraft".

"Candence" Relief Paste pink is with Kaisercraft Cross stencil. A daisy punch and clear gemstones.
Foiled butterflies from the "Craft stall".
Card stock lollipop pink and lemon. 3/4 heart punch. Daisy punch.
Words are from Kaisercraft "Fly Free" and" Golden Grove" sticker sheet.

CUTTING :

Cut four triangles, and  1 1/2" x 12, 4" x 12"and two 6" x 12, "
Punched nine daisy each out of yellow and pink card stock. Three of hearts one pink and two yellow. Photo Mat - yellow 4" x 4", pink And 4 1/2 x 4 1/2.

Stencilling :

Using pink relief paste and crosses stencil. Stencil is a a! 6" x12" triangle 6" from left hand side.

Putting together :

Working from left to right glued small triangle first. Then flowing up with the remaining points triangles.
Next the photo mat, glued yellow to pink. Taped photo to yellow mat. And placed 4" from the top and 3 1/2 right hand side.
Added the butterflies commencing in the lower left hand corner, next bottom left of photo mat, and then top right of photo,with the last one being placed in the top right.
The three hearts are placed at the right hand side of the photo mat.
Randomly placing punched daisy on the top right hand triangle. The adding pearls to Punched daisy's.
Add wording to second triangle diagonally and to the bottom of the stencilled triangle.

Thursday 19 April 2018

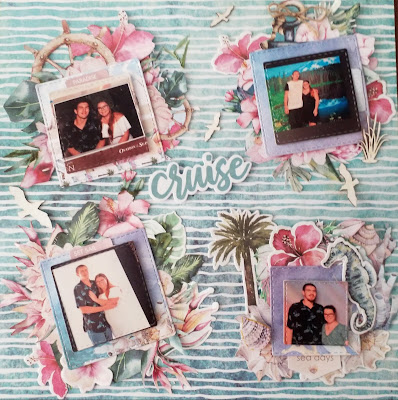
Cruise _sketch challenge Anna' craft cupboard

Evening all.
Just finished this sketch challenge. I another layout completed for my daughters album.
This layout had more fussy cutting then anything else.


CUTTING :

Cut Kaisercraft "Island Escape" - "Driftwood" to 12"x 6 1/2".

Stencilling:

Used a sand stencil with textured paste and brown paint to make photo mat out of beige card stock 6.1/2" x 4".

Fussy cutting:

Fussy cut the bottom Hibiscus and palm trees from "Maliki" .  Fussy cut all the flowers from "Hibiscus".
Inked the wooden flourish in Kaisercraft is "Lagoon" ,  "Bark"and" Avocado".  The anchor I have painted with Metallic silver paint.

Putting the it all together.

Glue the "Driftwood " sheet to Kaisercraft "Coastal Escape" _"Underwater". 1" from the bottom.
Added stencil photo mat 4" from the bottom and 3 1/2" from the left hand side.

Next is to add photo with foam dots, placing them in the middle of photo as I need to place by fussy cutting under the photo.
Attach to photo Mat leaving 3"at bottom of photo.
It's time to add all the fussy cutting,  flourish collectables and flowers from my stash evenly around the photo,.
leaving 2 1/2"at top and bottom using foam dots and lots of layering.

Added wording from the salvage of the "Mali".

In top right hand corner added 5 Hibiscus from the sticker sheet. Above this is the I have added the date cut from the photo.


Wednesday 18 April 2018

" I Do " - Blog Challenge for White with One ( Aust )

Afternoon all.

Completed this one over the weekend but need to get some photo's printed as needed  2.5"x 2.5".

The challenge was use white with toffee crunch with a sketch. Did not read the sketch bit so ended up with two layouts. Ah well an extra layout for our son's wedding album.
For this challenge I gave chosen Kaisercraft "Back to Basics" and "Mix and Match" 


The cutting of the layers:

First piece "Lattice" I have cut to a 10"x4" then cutting it into a 4"x5" piece.
Cut second rectangle from"Damask"and again cutting it in half.
Using a piece of paper from "The Craft Stall" I have cut a piece 10"x 3"and then cut a half circle for the tag insert. Cut a 3.5"x 3.5"square from the"Mix and Match" collection "Polka Dot" . 
Cut a piece of white grown grain ribbon 10.5".
Cutting completed.

Putting all the pieces together:

Take each of the four rectangles ensuring that you are using the the reverse (4 different rectangles).
Placed these onto "Pin Strip" reverse from the Kaisercraft "Mix and the Match"  collection, 1" from the top and 1" from the left hand side, using double sided tape. Glue grow grain ribbon over the join. Next take the 10"x3" and place it 3 1/4 from the top and 1/2" from the left hand side using double sided tape ensuring you leave the right hand side free so tag can be placed inside.
Using the 3 1/2" rectangle place in at an angle on the left hand side over the top 10" x 3"rectangle.

Embellishments time:

Using tag from the collectables "Mix and Match" tied a piece of string to end, add tag to circle end of 3" rectangle.
From the sticker sheet of "Mix and Match" used a half doily on the right hand side of the ribbon. Then added title from letters on the sticker sheet, added hearts at the top of the grow grain ribbon, used the wording love from the sticker sheet and added to bottom of the 3 1/2 photo mat and added another heart sticker over this. Added butterflies to three corners of the rectangle

Add the three photos.


Monday 16 April 2018

Mum and Dad - Kaisercraft April Challenge

Morning all.
Yet another challenge completed, this time for Kaisercraft. The Mood Board was all about grey, brown,  cream, and licorice.
For the April challenge I have used their "Pen and Ink"  Collection as it suits perfectly.


PRODUCTS USED::

Kaisercraft "Pen and Ink" Collection : " Etchings,  2 x Chandelier, Collectables and Sticker Sheet. Alphabet Dye,clock stamp and brown pearls

CUTTING:
Starting with "Etching" reverse have cut 1/4" off the top leaving salvage intact. Next cut an 8" square from the middle as reverse side has butterflies which I will fussy cut later.
Using "" Chandelier" cut the salvage off. Then cut 1" off the right hand side. Then cut an 1"off the top.
Cut an oval shape from the second  piece of "Chandelier "reverse 5.6" x 4.58",
this will be the photo mat. Inked the photo mat with black Kaisercraft pen

Next to the step is all the fussy cutting:

From "Etching" cut six butterflies . Dye cut title using Kaisercraft alphabet dyes.
 Using "Chandelier " fussy cut the flowers cluster from bottom left included the time stamp, and all remaining flowers. All the cut edges are inked in Kaisercraft brown or black ink.
Stamped clock  underneath where the oval would sit, also stamped a few on the  off cuts of"Chandelier ".
At the top of "Chandelier" fussy cut around the small daisy as it  sits over the  photo frame.

Putting it all together :

Using the "Etching " reverse as my foundation I have placed the "Chandelier 1/2" from the top and left side ensuring the large flowers where at the top left and chandelier was bottom right. Layered photo mat {with foam tape} with the reverse of "Chandelier" facing out and ensuring previously cut around daisy would sit at top of photo frame.
I then Layered all my fussy cuts and collectibles around  {using foam tape} the oval leaving a space to add a hidden  journal tag which I have added string which was white but dipped it into tea to change colour (the tag has their names and the date and where the photo was taken). Placing extra flowers on top left and right which had preciously been cut from the "Chandelier" paper. Added words from the sticker sheet. Cut an oval from"Chandelier " reverse place it at bottom right hand corner to cover chandelier added butterfly to oval using foam tape. Added photo to oval. Added title and brown pearls.

Sunday 15 April 2018

My Sunshine - Maureen Wood (Aust)


Morning all,
This month's  challenge for "Off the Rails" Scrapbooking blog was to use bright colours:Pink, purple, green, blue, orange, red, just loads of colour.
For this layout I decided to use Kaisercraft  "Tropical Punch", not much left now. Maybe card time for the little bits.


Cutting of the pieces:

The background page is from Kaisercraft and "Remember Me" collection. Cutting "Fun Times" to an 11"x11". Tearing top and bottom down the a quarter of an inch.
Cut 9" circle and from "Fun time" reverse.
Cut 6.5" circle from "Pineapple".
Cut photo mat 6.5"x 4.5" from ". Mock tail".
Fussy cut flowers from scraps of "Fun time"
I had a few fussy cuts from a previous layout from "Cocktail" which I have also used. I inked all edges with either red or green ink.

Putting it all together :

Layer "Fun times" * over the red sheet leaving a quarter inch boarder all the way around. Next layer the 9"circle 1.5 from top and 1. 5" down from top and left hand side using foam dots. The Take your 6.5" circle and centre this over the top of your 9" Circe using the foam dots.
Next add your photo to your photo mat using tape. Centre your photo mat over your 6.5"circle using foam tops.

Now to embellish:

I have taken the yellow check strip from the Sticker sheet and cut in half and placed it on top and bottom of my photo mat. Using fussy cuts have added roses to all four corners using foam dots, placed other roses around the 6.5"circle with foam dots,  added a pink and yellow flower from my stash.  Added title and wording from the sticker sheet. Layout complete.

Friday 13 April 2018

Mood Board for Mystical Scrapbooking Challenge

Afternoon all 

My second post today is for the Mood Board over at Mystical Scrapbooking.
The Mood Board was all about pale colours of pink , lilac, blue and lemon.

I have chosen to use Kaiser craft " Fairy Garden" collection.


I started with "Pixie Dust", cut a half of inch off the top as I wanted to use the words on the salvage.

Cut 3.5"rectangle from "Fluttery, a 6"circle from" Moonstone" reverse and a 7"square from "Magical".

Dye cut doilies from the the 6.5" paper pad using, pink glitter paper and green paper. Cutting  each doily in half  spacing them around the circle previously cut using foam squares.
Using another decorative dye "Perfume Label" cut 4labels using "Moonstone",  cutting  them in half and placing them under the photo using glue.
Fussy cut butterflies from "Fluttery" and flowers from "Magical" Fairy's from the paper pad to be used as embellishments.

Now to assemble, added the rectangle 3" from the top and centre on the "Pixie Dust", placing the butterfly rectangle in the middle of the sheet.  Next is the first circle which is placed using foam squares 2" from the top and centred in the background sheet, adding photo onto the middle of circle using foam dots. then from the 6.5" paper pad added a boarder piece.
Now to embellish, using fussy cuts and and collectables placing them around the page using foam squares. Dye cut the title "SHINE" from the lilac card stock. Use a dye cut flag and added their names and the date.   Finishing of scattering gems thru  out.

April challenge for Lets Get Sketchy

Hi Guys

Have two to post today for two different challenges a bit behind in my posting
This is my interpretation of the April  " Lets get Sketch" Challenge.
Hope you like it. 


I have used Kraft card stock as by base onto that I have stencil a diamond pattern masking off each section not required  using texture paste and paint- yellow red and green also added a stripe of blue with Nuvo embellishment paste. Red diamonds in a row of two left and right vertical. and three horizontally stripes.

Cut photo mat 6.5" x 4.5" from "lemon custard" card stock from Two Scoops and second mat at 7"x 5" out " Light" from Kaiser craft " Chase the Rainbow" Collection   stock offset these and added 6" x 4" photo. With placement to the right hand side    of red diamonds and third diamond from the bottom.

Cut 4 x 1"  diamonds from "Lemon Custard: and 5 x 1" diamonds from  "Rainbow" and two  2" diamonds. from " Rainbow.  adding these too the left hand side of the photo mat  starting with large diamond and ending with a large diamond cut in half.

Stamped Lines using red ink under photo and added A circle with the wording "Smile Always for my title with foam tape. Add two  arrows to the top right of the photo mat.
To finish off added splatters of red paint.

Thursday 12 April 2018

Friends - Scrapbookit blog challenge

Afternoon all

Scrapbookit Challenge for April is: The  word friends, dye cuts, stamping and use a colour you would not normally scrap with.
The colours I have chosen are orange, brown and Bubble gum. I have decide to use Kaiser craft "Bombay Sunset", which is match to what I wanted to do, and I have included a blue with it to tie it all together.


My first step was to glaze paste "Rosewood ". Whilst this was drying I fussy cut flowers and leaves from "Daybreak". Stamped feathers and butterflies on the "Rosewood" and "Sundowner" using Brilliance ink in the colours of Purple and Lilac. Dye cut a tag and added journalling to it (date and who's in the photo). and attaching a piece of bakers twine
Cut photo mat 6.5"x 4.5"from"Mumbai" reverse added photo using foam dots.
Now it's time to put it together.

Using "Rosewood" as back ground . I cut a triangle 8" x 12" from  "Bollywood" and include the doily. Placed this at the top of my layout.
Adding "My friends"  title across the join. The  wording is from the "Misty Mountain" collection. I have also used wording - friends are the Sunshine of my life from the Botanical collection.

Adding photo mat 5" from the top and 1.5"from the left, inserting hidden tag under the mat on right hand side.

Now using my dye cuts, fussy cut flowers, leaves and stamped images I placed these around the top and left hand side of the photo using foam dots. A row of doilies has been placed at the bottom of the photo mat.
I added butterflies and feather dye cut to right had side around the baker's twine of the tag.
Added extra wording from the sticker sheet. To Finnish off dye cut two butterflies and in gold from the paper and pad.
Hope you like it.

Monday 9 April 2018

All things Shiny


Morning,

The second layout i completed over the weekend.

This challenge supports Beyond Blue under the Group by Happy Hour craft challenge Creating positive conversation through craft.


For this layout I have used the  Kaisercraft "Shine Bright" Collection.

"Canary" for the base  . 
Cut  6" X 12" piece from "Sunflower" following the wave line to make triangles top and bottom
Cut Photo mat from "Bumble Bee","Sunflower"and gold glitter card stock off setting each piece, added photo. 4"x4"
Dye cut three large  and two small tags out of black card stock adding words from the Sticker sheet of the "Shine Bright " Collection
To each of the ends of the tags have added gold liquid pearls.
Cut the salvage off the bottom of " Sunbeam" and added to bottom of page 
Dye cut the word "Sunshine" from gold mirror card and used it as my title.

Born to be Wild

Morning All

This is my take on the Sketch challenge for Mystical Scrapbookers

They have two challenges a month, the first one  i have completed is the Sketch challenge.


I have used Echo Park "My Little Boy" collection

The background is "Bikes and Buses Reverse" I have used a 12x 12 sheet
I have then cut a 4" strip of "Bikes and Buses"
Cut photo mat one 6"x4" and one 4"x4" out of "Journaling Card" Reverse.

I have placed a strip of  "Journaling Card" Reverse at the top and lower end of the 4" strip.

The title is from the sticker sheet and "My Little Boy" is from salvage from "Bikes and Buses Reverse"

Added rick rack braid from my stash over the strip of  "Journalling Card" Reverse at the top and lower end of the 4" strip.

Dye cut date tag from yellow card stock and two love hearts out of white card stock

Added date and gold cord to the date dye cut.

Friday 6 April 2018

Sketch gallery add to the Creative Scrapbook Magazine

 Another Layout completed for April.

This time it was the  Creative Scrapbook Magazine sketch page.


It was to use three photos. The sketch has been followed closely  but extra embellishments have been added
The page is for our sons wedding album.

I have used Kaisercraft :Ooh La La" collection from 2016
"Cest La Vie" reverse for base cut to 11 1/2" square and backed to Kaisercraft Blue Haze card.
Cut nine photo mats from "Oui Oui, Reverse, C'est La Vie, reverse, Belle, Bon Jour". at 4" square.

The angle piece at top of page is cut from "Oui Oui"  reverse
 
Cut photo's to 3" x 3 1/2 " and place on mats

All photo mats and Title cut using my scan and cut.

Embellishments: Clocks, keys. butterflies from sticker sheet.
Quote from "Tres Chic"

The wording under the angle is from "True Love" Collection " My Sweetheart"
The words Blessed, Cherish, Thankful, Will you mine, and the doily are from The "True Love" sticker sheet.
Flowers and gems from my stash
The royal blue butterflies are from "A Mothers Art".


April challenge- Kraft

Into a new month already, Time flies by:

This months challenge for Kraft is:

Something Old :
Something New :
Something Borrowed :
Something Blue.

I knew which photo i wanted to use as soon as I read the challenge, it is of my Granddaughter Isabella and her partner Connor on her Year 10 graduation night. Isabella purchased the dress in L.A. when she was on a dance trip to Disneyland  earlier that year.


 Something Old : The paper is Kaisercraft " Madame Boutique from November 2011
Something New : Open a new Kaisercraft ink pad "Island Lagoon and Cadence Paste (which i had never used before) Metallic Blue
Something Borrowed : the stencil and the gel pen from our grandchildren stash. They have their own stash to  use when they come to visit.
Something Blue: Blue flowers stencilled, butterflies. Isabella dress, Connor's tie. Lots of blue.

The Base is Kraft card stock which i have stencilled two flowers using Kaisercraft Island Ink for the left hand side, Lagoon ink for right hand side and Gum Leaf  ink for the leaves.The Middle flower i have use Nuvo Embellishment Mouse.  the bottom flower I used Cadence  Relief Paste Metallic Blue.
I cut the mats using Kaisercraft Madame Boutique - "Blouse" using both sides for the two mats, Staggering these and adding a 4"x3 1/2" photo. 
Fussy cut flowers from from  Knickers and Corset, layering them around photo mats and over the stencil flower leaving the flower at the top.
I dye cut several butterflies out of "Pinafore" and "Knickers" and placed them around the fussy cut flowers.
Out lined the leaves and stem on bottom flower with the gold gel pen
Added gems to centre of flowers
Used tags, letter and numbers to make title and date from the Sticker sheet.