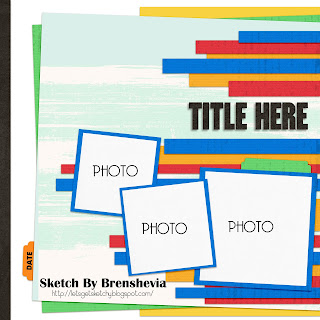
Monday 27 August 2018

Imagine

Hello Everyone


After a wet weekend and a cool start this morning, the sky is blue and the sun is out , its mid morning and it is 18 degreesYesterday i finished a layout for "Scrapbookit" blog , perfect weekend for scrapping.

http://scrapbookitblog.blogspot.com

Their challenge is:-

They would like you to use the Word "IMAGINE" , JUST TAKE INSPIRATION FROM THE WORD   IMAGINE , USE IT IN A QUOTE , TITLE, USE PRODUCTS THAT LEAD YOUR IMAGINATION TO SOME WHERE SPECIAL


There was just two  many choice, I have used an old photo from 1970 , on my first holiday by my self . My biggest problem was  the paper i wanted to use  i had to join the paper as i had  used     it on a layout previously. This was the simplest layout ever, it was just a matter of getting all the embellishments in the right space.

My take on the Challenge:


PRODUCTS USED:


Kaisercraft "Island Escape" Collection :- Makai  (reverse) Kahakai  and collectables. 
Kaisercraft wooden fence, and flourish pack 
Kaisercraft Summer Splash collectables  and sticker sheet
Photo 2.5" x 3"

CUTTING:

Cut the top right hand corner phases word 6" x 4"
Cut the green Zig Zag piece 


ASSEMBLY:

Add the ziz zag pattern to the Island Escape  cut from "  Kahakai" so that it covers the words. Add photo

Add Photo mat 4" from the top and 2" from left hand side of "Makai"  (reverse)

Add Collectables  and stickers from "Island Escape" and "Summer Splash" as per photo layout


Thursday 23 August 2018

Good Vibes


Hello all, 

 Cool again this morning, but warmed up to be a beautiful day, I thought about this challenge for most of the Month. The challenge is for OFF the RAILS SCRAPBOOKING. The Theme is TRIBAL, had no idea as to what i would do the Design Team really did not give me much inspiration. Mixed Media is something i have got a grip on as yet.


https://offtherailsscrapbooking.blogspot.com


I decided to go with a Dream Catcher and incorporate the colours in on the  feathers and photo Mats


The Mood Board


MY INTERPRETATION:


PRODUCTS USED:

Kaisercraft "Misty Mountain:- Agate, Sunset, Purple Divine and Sticker Sheet
Kaisercraft "Wildflower" Collection:- sticker sheet
Kaisercraft Glitter card stock :- Mauve, silver and Purple
Royal Blue card stock
Imagination Starlight Metallic  Paints:- Dark Orchid, Aqua, and Silver
Kasazza Water colour pencils in Blue , Silver and Purple
Kaisercraft Glitter Pens:- Mauve, Silver and Blue
Clip art -" Feathers
Dream Catcher" from Neat n Craft Cutz - Esty Store
Uniquely Creative "Feather Dye" (set of three) and Tags dyes
Gems from "Venison pl"
Electronic Cutter
Kaisercraft white shimmer mist
3" x 3.75" Photo


CUTTING:

Cut Dreamer catcher using electronic Cutter using Royal Blue card stock, then cut  0.75" away from circle in a straight line so it sits neatly across the top of page
Dye Cut feathers in Glitter card stock one each Colour
Cut our 4 Feather from the clip art so they can be coloured
Dye Cut two tags from "Agate"
Cut 3.75" x 4.50" from "Agate"
Cut 3.50" x 4" from "Sunset"


COLOURING:

Coloured each feather with a different mediums see layout for colours
One in Metallic Paint, one in water colour pencils and two with the glitter gel pens


ASSEMBLY:

Add Dream catcher to "Purple Divine" 2" from the left hand side with top hard against top of   "Purple Divine"
Add photo to "Sunset"
Add "Agate" to the Dream Catcher 4.5" from the right hand side 1.50: from the top at right angle to the page
Add the Sunset piece so that each right angle piece sits at the right angle of Agate:
Add wording from the Sticker Sheet of "Misty Mountain" to the dye cut tags, add as per photo layout.
Add the black row of flowers from "Wildflower" sticker sheet to the bottom of "Purple Divine"
Add Gems and feathers as per photo layout 
Sprayed Shimmer Mist over page. Hiding photo whilst spraying


Tuesday 21 August 2018

Hike

Hello all

Very windy here to day , if you can find a spot out of the wind its beautiful, after i have typed this up need to go water the veg patch, this wind will dry them out very quickly.


I have been working on this one for the last couple of days not had much time to scrap cannot  focus for long periods at the moment after my eye surgery.  Hopefully this will improve soon, cutting is not perfect .

I have created this layout for the Creative Scrapbook Magazine Challenge, (Its a Canada based scrapbook magazine which comes out quarterly) I like to do Australian based photos , so it took me a while to decide what i was going to cut down to a 3.5 x 6" photo. I eventually decide to use photos taken whilst hiking to Twin Falls in Lamington National Park on the Gold Coast Hinterland in Queensland, with our grandson and his girlfriend.

https://creativescrapbooker.ca/sketchy/

Their Sketch


MY INTERPRETATION OF THE SKETCH


PRODUCTS USED:

Kaisercraft "Botanica",  :-  Plant, Stem, Roots and Roots Reverse, and sticker sheet 
"Limelight":-  Arise ( reverse) and "Open Road" sticker sheet.
Bella:- Alpha Thicker.
A Mothers Art Butterflies
Kaiser fusion pen in brown
2 x 3.5 x 6" photos


CUTTING:

Cut "Stem" 9.50" x 7"
Cut photo mat from "Arise" ( reverse)  3.75:" x 6.5"
Cut photo mat from "Arise" ( reverse)  3.75" x 7"
Cut " Roots "  5" x 3"
Cut "Roots" (reverse)  3" x 2.50"
Cut "Arise" (reverse) 1.25" x 2.50"
Cut "Arise" (reverse) 2" x 2.5"
Inked all cut edges with the Brown Kaiser fusion pen


ASSEMBLY:


Using "Plant" as your background piece add  "Roots" 5" from left hand side and at an angle so point is 025" from top
Add "Roots" (reverse) at an angle so point is 0.25 from the top and 2.25 from the left hand side
Add the Piece of  "Stem", 1" from the left hand side and 1" from the top
Use photo of layout as your guide
Add photo to mats using foam tape
Add the first photo mat 1.25" from the left hand side and 2.50" from the top
Add the second photo mat 5" from the left and 1" from the top
Add arrows from "Open Road" sticker sheet to smaller cut piece of "Arise" reverse
Add flower stem from Botanica sticker sheet to the other piece of Arise reverse
Added the two tags from the Botanica Sticker sheet 5" from the left and just under the second photo as per layout
Added the tag from the "Open Road" sticker sheet
Added wording , title and butterflies as per photo of layout


Monday 20 August 2018

Passport Memories

Morning all,


Its Monday . A fresh start to the week and hopefully i will get a bit of scrapbooking done this week as not as many appointments,  Cooler day here today, due to the westerly winds, too cold to go outside outside and do any gardening, the wind would blow me over as i am not to steady on my feet.
Today's challenge post  is for "Let"s Get Sketchy Blog spot Mid monthly challenge, I loved this sketch as it enable me to use scraps from the collection plus 4 photos of my daughter trip to England, Paris and Belgium in 2015, still have a few to scrap, These where the only small landscape ones i had


http://letsgetsketchy.blogspot.com

THE SKETCH:


Let's Get Sketchy


MY INTERPRETATION OF THE SKETCH:


PRODUCTS USED:

Kaisercraft "Just Landed" Collection:- World  Map, Passport, Baggage (Reverse), Passport  (Reverse) and Sticker sheet.
Kaisercraft White card stock.
4 x 3".2" photos
4 Black pearls
Kaiser fusion pen in black


CUTTING: 

Cut "World Map" 8.5" x 12"

Cut wording from "World Map" 1" x 12"
Cut "Baggage" Reverse"  9.25" x 5.25" x 3.50" wide
Cut  "Baggage"5.25" x 6.75" (into triangle piece)
Cut from " Passport" on top right the square which has "Big City Fun" cut this down  to a 3" x 3" triangle
Cut photo mats from " Passport" Used 4 squares of 3" x 4"


ASSEMBLY:

Added the piece of "World Mao 8" x 12" to white card stock, Leaving the top not stuck down
Added the piece of "Baggage" Reverse"  9.25" x 5.25" x 3.50" wide to the top right hand corner see photo layout, tucking it under the piece of "World Map"
Add the piece of  "Baggage"  to top left hand corner ticking in under the piece of  "Baggage" reverse.
Add the small triangle from "Passport"2.5" down from top, so it neatly form a V point with the other two pieces of  paper
Add photo to photo mats
Add to page staggering and overlapping commencing 1" from left hand side and 5" from the top
Added wording 1" from bottom across the page
Added stickers from the sticker sheet as per photo layout
Added Black pearl dots beside title


Saturday 18 August 2018

Greeting Cards


 Supporting BEYOND BLUE


Morning all on this  gorgeous day. 


I have not done much scrapbooking this week, hope to complete some this afternoon and tomorrow, as still have three challenges to complete by the end of the month


Life has got in the way.Life this week has been busy with trades people and appointments.  Yesterday my granddaughter came down for her dental appointment , she has been in preparing to get braces. (That"s the next visit). Then we have lunch she likes to try different restaurants each time no fast food joints for her.


I did  make a few cards early in the week, one for our daughter's birthday and the others for an order.  My order colour was for yellow tones. I have made them all out of my left over scraps from the  Kaisercraft "Golden Grove" collection.Two cards at 15 cm x 15 cm , An A6 card  (13 cm x 13 cm) and a 10.5 cm x 15 cm.which was perfect for my new stitched rectangle layering dyes from Paper RosesI think it looks quite effective with the layered rectangles.The green toned butterflies are from "A Mothers Art".

Hope you like them:


Tuesday 14 August 2018

Discover, Explore, Love

Afternoon All


Its a beautiful day here is sunny Queensland , nearly the end of winter and its 24 degrees.
I finished this layout this morning. it's a challenge for the Kraft + Community blog 


http://kraftpluschallenges.blogspot.com


The challenge is be inspire by Terracotta.

The hardest part was deciding what photo to use,  I decided in the end to use one of my grandson taken many years ago outside the flats they lived in against the  brick wall
I used crackle textured paste and distress crayons to create a brick effect. with a scratchy and brick Template. Still not quite mastered the adding of texture paste to the stencil, still a bit messy.


MY INTERPRETATION OF THE TERRACOTTA COLOUR:


PRODUCTS USED:


Kaisercraft Kraft and blue card stock
Modern Industrial Paper- Brick
All Occasions Paper Pad- In the light and dark Terracotta colour and floral
Ranger Distress Ink :- 
Distress crayons :- Rusty Hinge and fossilized Amber
Kaisercraft Scratchy and  Brick template
Ranger Crackle Paste.
Salvage from "Factory 42" collection : Metal Bars and Sticker sheet
Kaisercraft Dye cuts  Arrows 
Uniquely Creative Orbital Dye
Kaisercraft Embossing folder Dots
3" x 4.25" photo 


CUTTING

Cut 2 X 3.5" X 2"  from the floral paper
Cut 7.5" x 5.5" from the Brick paper
Cut 5.75" x 4 " from the Brick Pattern
Dye Cut 2 arrows from the Reverse of the floral paper
Dye cut small orbital Dye from the reverse of the floral paper
Cut 2 x 1.5" x 0.25" from blue card stock
Cut 2 x 2.25" x 0.25" from blue card stock
Cut  2".25" x 1.75" from blue card stock
Cut 1.50" x 3" from reverse of floral then cut fish tail
Cut 2" x 3" from  reverse of brick paper then cut a fish tail
Cut 1" x 1" and create corner piece from the brick paper
Cut two piece from the brick paper  1"x 1" and 1" x 1.50"
Cut the word from the salvage of Metal Bars to fit the  4 cut piece of blue card stock 


BACKGROUND STENCILLING:


Add Rusty Hinge and fossilized Amber to the crackled paste, place stencil 1" from left hand side 1.5" from the top of Kraft card stock and randomly run textured past through  stencil, Using the same process used the Fired Red ranger distress ink and randomly add to page
Using the scratchy template, randomly add texture past across the piece of Kraft card stock
Using Fired Red ink add some to the stencil bricks 
Add the Texture Paste  to 5.75" x 4 " from the Brick Pattern
Once dried colour with brown Kaiser pen randomly
Emboss the two piece of which have been fished tailed with the Dot embossing folder.

ASSEMBLY:

Add photo to photo mat  5.75" x 4 " of Brick Pattern using foam dots
Add 7.5" x 5.5" of  Brick paper  to the Kraft card stock 4" from the top and 2.50" from the left using foam dots
Add the floral pieces so that they form a triangle 3.5" x 2" at the top  and 4" from left hand side  and 1" x 1.5" at the bottom and 4.5" from left hand side tuck under the Brick pattern sheet
Add photo mat at an angle with top left point 3.25" from left hand side using foam dots
Tucked the two fish tail pieces , overlapping each other at an angle 5.5" from the top 
Add words, collectables and small dye cuts as per photo layout 


Sunday 12 August 2018

Time

Hello all,


On this windy afternoon, if you can stay out of the wind, its a nice 24 degree.
This afternoon i have been working on my layout for the White with one challenge.

https://whitewith1.blogspot.com

This month it was for a sketch and the chosen colour was sunny yellow.
When i first read this, i had to give it a bit of thought on which papers i could use as yellow is not a colour i usually create with. I tried to remember if i had any in my paper stash. I knew i had Kaisercraft "Golden Grove" collection, but most of that had mixture of green and gold.. So the search began and I came across Kaisercraft "Shine Bright" i had to go back to the drawer which contains the 2015 papers. Next step was to go through the lace, ribbon and flowers to find some embellishments in the colour of sunny yellow. I think  i have it all now. Looking at the colour I think mine is probably a bit brighter than their chosen colour


THE SKETCH AND CHOSEN COLOUR


August Optional Sketch


MY INTERPRETATION OF THE SKETCH:


PRODUCTS USED:

Kaisercraft "Shine Bright" collection:- Bumble Bee, Mango, Daisy (reverse) and Sticker Sheet.
Kaisercraft white card stock
Kaisercraft "Golden Grove " Collection
Kaisercraft Fob watch Dye and Alphabet Dye
Button,Yellow rick rack, white with yellow daisy grown grain ribbon , yellow flowers from my stash
Uniquely Creative Yellow Stars and white Pearls
Kaisercraft 2 Cool 4 School, yellow ruler salvage
Ranger Distress Crayons in Fossilized Amber
2 x 3" x 4 " photos


CUTTING:

Cut  9" X 4" from "Bumble Bee"
Cut 6.5" x 4.5" from "Daisy Reverse"
Cut 3.25" x 1.50"  Yellow and white arrow from "Mango"
Cut 9"  grow grain ribbon  and make a fish tail at one end
Cut 10 "Salvage from "2 Cool 4 School"
Cut Yellow daisy flower lace to 8.25"
Cut the yellow daisy from the "Golden Grove" sticker sheet 4.50"
Dye Cut Fob watch from white card stock
Dye Cut Title from Alphabet  Dye.
Cut 1.25: of yellow rick rack
Cut fish tail from yellow spotted sticker from "Shine Bright" sticker sheet

ASSEMBLY:

Add "Bumble Bee" 1" from top and 2.5" from left hand side
Add photos to "Daisy Reverse"
Add "Daisy Reverse" 3.5" from top and 2.5" from left hand side
Add the row of  yellow daisy  2.5" from the left and directly under   "Daisy Reverse"
Add row of Grow Grain ribbon  hard against "Bumble Bee"
Add the Yellow ruler salvage 1.75" from left hand side (hard against the Grow Grain ribbon
Add Yellow and white arrow from "Mango" 1.25" from the bottom right hand corner
Add yellow button  at the pointed end
Add wording from the "Shine Bright" sticker sheet
Add Yellow and white tab from the "Shine Bright" sticker sheet
Add date
Add the lace yellow daisy over the grow grain ribbon and place white pearls in each flower centre
Add White Pearls in each centre of yellow flowers sticker sheet (See photo of layout)
Add fob watch 0.50" from the top and 2.75" from the  right hand side
Add yellow flower to centre ( as shown on photo layout"
Add Title and gems as per photo layout
Flicked  Fossilized Amber paint to the left hand edge and the right hand bottom of photo added yellow stars


Saturday 11 August 2018

Always and Forever

Afternoon all,
Haven't posted for a while, I had laser surgery on my right eye to unblock tow of the shunts., so out of action due headaches and blurred vision for a couple of days. I will not know the results for another three weeks. Hopefully it i cleared them. Looking at my photo it is very wonky so my vision is not what it should be. Ar well
Today's layout was put together for a challenge page over on "Sketchy Boards" face book pageI decided to use up some scraps from Kaisercraft "Always and Forever" collection.


THE SKETCH:


MY INTERPRETATION:


PRODUCTS USED:


Kaisercraft "Always and Forever" Collection :-  Devotion, Promise , Admire, Admire reverse, Keeps, Lovable.Sticker sheet.
Kaisercraft "Mocha" card stock
Rosie's Butterflies and Apricot lace Tape
Kaisercraft, "Rose Avenue"  Collectables.
Kaisercraft - Flourish Dye
The Apricot ribbion flower with glass flower where part of the Wedding favors.
A Mothers Art - butterfly
Uniquely Creative - white pearls
White 4" doily
Fiskars 3" circle cutter
Photo that can be cut to a 3" circle


CUTTING:

Cut "Devotion 7.5" x 9"
Cut "Promise 7" x 8.5"
Cut "Admire" reverse 10.5" 3.5" Reverse
Cut "Admire 8" x 3"
Cut "Keeps"  9" x 2" cut fish tale at both ends
Cut "Love able"  8" x  2" cut fish tale at both ends
Cut a 3" circle  from your photo

ASSEMBLY:

Add "Devotion: to the "Mocha" card stock 1.5" from the top and 2" from left hand side 
Add "Promise" 1.75" from the top and 2.25" from the left hand side 
Add "Admire " reverse 4.25" from the top and 0.50" from left hand side
Add "Admire" 4.5" from the top and 1.75 from left hand side
Add Apricot paper tape from left to right 5.25" from the top
Add "Keeps"4.75" from the top and 1.20" from left hand side
Add "Love able" 1.25" from left hand side and 5"from the top
Add photo to doily
Add doily 4.25" from the top and 3.75" from left hand side
Add embellishments and wording as per photo of layout


Wednesday 8 August 2018

Picture Perfect

Morning everyone,


It's a lot cooler today 5 degrees this morning, but the sun is shinning so should be a nice day
Today blog post is in regards to a challenge over on Made to Scrap the Aussie way face book Page
Their goal is that we support Australian products. They have posted a sketch to use
Over the last week  they have posted a list of Australian business I did not realise how many there where out their.
In my layout Today, i have use  all Australian products bar one, as I am not sure who made the little enamel flowers I have use and the felt i used to cut the doily.


THE SKETCH:


MY INTERPRETATION OF THE SKETCH:


PRODUCTS USED:

Kaisercraft "Indigo Skies"  :- Shibon, Moon (Reverse), Misty (Reverse), Chambray and  sticker sheet
Kaisercraft glaze paste.
Kaiser fusion pen A05
Kaisercraft Doily Dye
Kaisercraft blue flower
Kaisercraft Indigo Ink
WOW:-  chipboard title and hearts
Corbett Creations :-Stars
A Mother's Art :- Butterflies blue
Blue felt
Light blue Enamel small flowers ( No brand name as received in a Scrapping Fun Kit)
2 x 3.5" x 3.5" portrait photos
Uniquely creative blue enamel dots

CUTTING:

Cut  Fish tale 3" x  6"  with a 1.50" fish tale from "Moon" reverse
Cut 7.5" x 5" from "Misty" reverse
Cut 7.5" x 5" from "Chambray" (photo mat)
Dye cut doily from felt
Cut salvage off "Shibon"

INKING:

Inked each of the chipboard and wooden flourishes with "Indigo" ink and once dried cover with glaze paste.

ASSEMBLY:

Add  "Moon" reverse to "Shibon" 4.5" from the top and and tails 1..25" from right hand side 
Add  "Misty" reverse to "Shibon"   3.25" from the top[ and 1" from left hand side using foam dots
Add  "Chambray" 3.75" from the top and 1.25" from left hand side  using foam dots
Add Photos to mat leaving a 0.25" boarder
Add embellishments as per photo of layer
Flicked dots of ink around the layout                                                                                                              


Tuesday 7 August 2018

School Years


Morning all,

Another beautiful day  not as warm as yesterday, we had some rain overnight. Hopefully the farmers received more than we did
Today's blog is about a layout for the Lets get Sketchy blog. It is there first of the month August challenge


http://letsgetsketchy.blogspot.com

I have used  School photos of my grandson last three years of school
I loved this sketch , I thought it would be perfect to use up the  words  and the measurement strips on the sticker sheets. I have used two Kaisercraft paper Collection.


THEIR SKETCH:


Let's Get Sketchy


MY INTERPRETATION OF THE SKETCH:


PRODUCTS USED:

Kaisercraft "Documented" collection :- Ledger, Qwerty, Scrap Paper ( Reverse), Ephemera  (Reverse), sticker sheet and Collectables 
Kaisercraft  "2 Cool 4 School" collection :- P.E
Uniquely Creative, Cork board Alpha 's
Photo's 3" x 4.25 x 1 , 3.75 x 2.75 x 2

CUTTING:

Remove the salvage as you go 
Cut "P.E." 11.5" X 8"
Cut "Qwerty" 10" x 10"
Cut " Scrap Paper 10" x 10"
Cut photo Mats from  "Ephemera" reverse 2 @ 3" x 4" , 1 @ 3.25" x 4.50"
Cut strips of " P.E"


ASSEMBLY:


Use " Ledger" as your base
Add "P.E" reverse 0.25" from the top and hard against the right hand side 
Add "Qwerty" reverse  at an angle so it sits 1.25" from the top and 1.75" from the left hand side
Add "Scrap Paper" reverse 1.25" from the left and 1.75" from the top at an angle
Using the cuts strips of  "P.E" words and measurement strips from the sticker sheet, Add to your layout randomly as per photo of layout. Staring at the top right hand corner and 0.50" from the top, overlay a few of the strips.Leave a space for title at 3.25"
Add the three photos at angle with the first one 5.50" from the top and 2" from the left, overlap the second so it sits 6" from the top at an angle with the third photo being 0.25 from the right hand side and 5.25 from the top (see photo layout).
Add random tags with date to  left had side .


Monday 6 August 2018

Precious Moments

Morning All


A beautiful warm morning 22 Degrees, too nice to be inside, I think Spring has come earlier, but it would be nice to have some rain.
Today's post is a layout i completed for Scrapping Good Time face book page

For this challenge vintage is the theme, don’t have vintage photo’s try a modern one with a vintage theme, black and white, colour, sepia the warm tones, old and new. Let me see what inspires you to come up with vintage,"

For this challenge I have chosen a large photo of my husband as a boy with his grandmother and his Auntie (His mother's sister) taken in 1958. they lived behind a saw mill in Kempsy  N.S.W. my husband has fond memories of the time he  spent there. The photo was a leftover one when we completed a collage for our lounge room wall . I had this one  printed in the wrong size.

I chose a Kaisercraft Collection called " Story Book" due to the vintage colours and the collectable

MY TAKE ON THE CHALLENGE:


PRODUCTS USED:

Kaisercraft "Story Book" Collection :- Library card, Page (reverse) Borrow, Typewriter (reverse)  Read reverse, ,Sticker Sheet and collectables
Tan coloured, Two Scoops " Mint Chip card stock
Kaisercraft  Wooden Flourish "Vine:
Kaisercraft wooden flourish "Cogs
Kaisercraft  Wooden Flourish Vintage clock
Kaisercraft Corner Flourish
A Mothers Art Butterflies in  green and brown 
6" of cream lace 0.25" wide .
Mod Podge  Dimensional Magic
Kaisercraft brown and green, Gum Leaf green stamp pad Ink
Uniquely creative light brown ink
Photo 6.5" x 5"


INKING:
Inked the clock in Brown  while tack add touches of Gum Leaf Green     
Ink the Tree in Light Brown and green leaves, whilst still tack add Brown to trunk
Ink Cogs and  corner flourish in brown
Once all the wooden flourish have dried add Mod Podge to each flourish   


CUTTING:

Remove salvage from each piece prior to cutting
Cut "Library Card" 11.5" x 11.5"
Cut "Page" Reverse 8" x 10"
Cut "Borrow" 7.25" x 10.50"
Cut "Typewriter"  reverse" 10" X 7"
Cut "Read" 6" x  8"     
Cut "Mint Chip" 5.25 x 7.  (Photo Mat)     
Cut  6" piece from the row of drawers from "Read reverse"    
Cut a 6" piece of Film strip from  "Read reverse" 
Cut a fish tale 3.5" x 0.75" from "Mint Chip"

ASSEMBLY:
                                                                                                                                                                                                                                                                  Add  "Library Card" 11.5" to tan piece of card stock
Add  "Page" Reverse  2" from the top and 1" from left
Add  "Borrow" .75" from the top and hard against right hand side
Add  "Typewriter" 1" from top  and hard against right hand side
Add  "Read" reverse 2" from the top and hard against right hand side using foam tape
Add photo mat 2.75" from the top and 0.50" from right hand side, using foam tape
Add Photo using foam  tape
Added salvage from "Library card" 0.50" from left hand side vertical
Add  wording from the sticker sheet 2" from left hand side vertical on page
Add piece of cream lace , tuck in under  "Read" reverse
Add row of drawers beside the cream lace
Add the   words from sticker sheet to film strip, then place 4.5 " from the left hand side using foam tape
Add the embellishments and title as per photo layout .
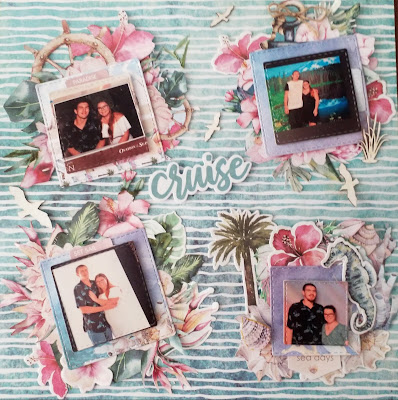


Saturday 4 August 2018

I've got nothing to do today but Smile

Afternoon all,


Its the weekend and its going fast, our son and his wife came in this morning. It's was a bit warmer this morning.  with the sun is trying to pop through the cloud.

Today's post is the second challenge on the Mystical Scrapbook blog.


https://mysticalscrapbooks.blogspot.com


The challenge requirements where to use:- Bling, Dye Cuts and 3 pattern papers only.I search my  left over bits  from collections where i have no full pages but cannot bear to throw outs the cut of bits, as I had an idea in my head of what i wanted to do.Found these bits and pieces from Kaisercraft Fly Free collection no full sheets just bits left over, I cannot remember what i scraped with them but know I made some cards or was going to make some cards as lots of 6" square bases. I will type this one up as if I was going to make it from scratch.


My Layout:


PRODUCTS USED:


Kaisercraft  "Fly Free Collection" QT, Gal Pal   BF. and sticker sheet
Gems from my stash  and Uniquely Creative enamel dots
Dye cut butterfly


CUTTING;

                                     
Cut "Gal Pal' 7.50"  x 12" or use a full sheet if you have one
Cut "QT" 7" x 12" leaving the flowers at the bottom , fussy cut around the flowers and the bird leaving them intact as we are going to tuck the photo mats in underneath.
Cut 6" x 8" piece from  top left of QT  fussy cut around the flowers leaving them intact
Cut the flower from the right hand bottom
Cut a 4.5" x 8".75: from "BF"
Dye cut 8 butterflies from "Gal "Pal" 4 from the outline dye and 4 from the insert.


ASSEMBLY:


Added  "QT" to "Gal Pal" , overlapping,  (Do not add any tape to the Bird where you have fussy cut or the flower at the bottom just under the bird ) as the photo mat will be tucked in under this
Place second smaller piece 3" from the left and 3.25" from the top, ensure the flowers are at the top, as the fussy cut blue flowers and leaves will sit over the photo.
Next add the the piece of  BF, tucking it under flowers which you have cut out at the top and tucking it under the bottom of the fussy cut area of "QT"
Add photo also tucking it under the fussy cut leaves and flowers
See photo Guide
Add the the flowers cut from the right hand bottom of "BF" 2" from the right hand side and hard against the bottom
Add the embellishments and bling as per photo layout.

Friday 3 August 2018

School Days

Afternoon all


Today's Post is about the layout i have completed for Mystical Scrapbooks Blog Challenge
https://mysticalscrapbooks.blogspot.com
They have two challenges each month  a sketch and one where they ask you to use certain items on your layout.

The layout came together really quickly once i had chosen the photos, have tons of  school photos to scrap, so thought i would use them .I used a couple of Kaisercraft school collections with a little bit of my homemade gesso that i need for another scrap challenge.


This one is the sketch:


Mystical Scrapbooks


My interpretation of the sketch:


PRODUCTS USED:

Kaisercraft "2 Cool  4 School" - Paper Art (Reverse), Social Studies (Reverse) Home Eco Gloss , salvage from Mathematics Sticker,  sheet and collectables 
Kaisercraft "Class of 87" - Times tables.
Home made gesso . Heat tool 
2 photos one Portrait  6" x 4" and  one landscape 5" x 4" Photo


CUTTING:

Cut Salvage from " Mathematics",
Cut the red and black rectangle leaving the the yellow tabs on from the " Home Eco Gloss"Cut       5.5" x 4.5 '" rectangle from "Social Studies" Reverse, making a tab from the word "LEARN"
Cut a 3.5" x 3" square of tables from "Times Tables"
Cut the wording "School Days" from " Home Eco Gloss" 3" x 1.5" leaving the blue lines on top and bottom.


ASSEMBLY:

Dabbed a small amount of gesso over base page "Paper art" reverse. dried with heat gun
Added photo to "Home Eco" 
Added Photo  to "Social Studies" Reverse  leaving the tab of the word Learn exposed
Added the green frill sticker from the sticker sheet to  "Paper art" reverse
Added at an angle using foam dots the  "Home Eco" 1.5" from the top and 0.50" from the left at an angle.Tucked the piece of "Times Tables" underneath leaving two lines at the side and three lines below the photo mat
Added second landscape mat "Social Studies" Reverse  4" from the top and 0.50" from the right hand side using foam dots.
Add row of pencils above the landscaped photo mat leaving the word "Learn" exposed  and the salvage from " Mathematics" underneath landscape photo mat
Add embellishments as per photo of layout