Wednesday 31 October 2018

Water colour

Morning all

The subject for this month is WATER COLOUR TECHNIQUES.

The first of the month has come around again very quickly with lots of great entries during October. Some of the people who have entered could better tell you about the techniques of water colour than I can. I have had little experience. Mixed Media is not my favourite part of paper crafting.
I have several items  I can use to create with Water colours, not that i use them very much except for my water colour pencils.I have Kaszazz Water colour pencils which i do use to colour my Card ImagesI have a Water colour paint set from Uniquely CreativeRanger Distress Crayons  and Kaiser craft Paints and MistsI usually leave the background painting  for my granddaughter to do. ( as she loves to play with paints) and always leaves me a supply when she comes to visit . I have only just run outHere are a couple of Images  that i have used in my cards and layouts with her  creating  the Back ground  with using some of the below techniques


With the card I have embossed it to bring our the colours


1)Technique of Colour Blending 

This is  experimenting with blending different colours together.First paint a shape or squiggle line with plain water only. Then dip the brush into the paint and add it to the watered area. Watch it spread, then clean your brush and choose a second colour. Apply this to the opposite end of your watered area and watch the colours blend together. You can move your paper side to side to help the water colour run together

2) Technique of SPLATTERING:

I do use this technique on my layouts, and is very messy and I hate messy, but not often
This technique makes quite a mess. I suggest covering any areas of your paper that you don’t want to be splattered. Load your brush with paint then hold it over the top of your paper. With the other hand, tap your brush and watch the paint splatter onto your paper. Rinse your brush, choose your next colour and splatter away. Or you can hold your paintbrush between your thumb and middle fingers. Using your index finger, pull back on the bristles and let them snap forward. This method is a bit unpredictable, but can yield some very fun results.

3)  Technique of Plastic 

Load an acrylic block  with desired paint then spritz with water,. Dab your piece of plastic ( used the plastic from packets of embellishments) into the colour and then place it onto your paper and smooch it down , continue placing it into your paint and onto your paper and smooching it, until the desired effect is obtained. Add water if require for the paint to drip

MY TECHNIQUE PAGE:


I have used each of the two of the techniques  (although  i would say not very well) on my layout. I think i am going to have  to watch more YOU TUBE VIDEOS. Before i attempt another one. 

I have used the plastic Technique on the outside of the page, splatters through out and each of the circles are coloured and then  water added to paint circles to give a shading effect

Monday 29 October 2018

Growing

Morning all,


Yesterday, I was home alone, which meant i actually scrapped two layouts,Today is dull and overcast although quite warm so decided to do my two posts  from yesterday first thing and then  I just have one more item to complete before the end of the month.

My First post is the second sketch for the month for "Lets get Sketch" blog.Yesterday i was going through my book that i list all my challenges in, ensuring i had completed all that  i wanted to do ( I nearly forgot about this one ), I had  not written it up in my book, but had printed it out and found it tucked at the back.
I chose to use an old Kaisercraft papers as there was only a little bit left and it suited the sketch as it did not require much paper. The paper I used was  "Technologic". all the bits left were scraps left over. I have written the instruction as if you had full sheets. I have made many cards from the collection as well as several layouts, but still those bits i hate to throw out.


PRODUCTS USED:


Kaisercraft card stock "Stone"
Kaisercraft  "Technologic" collection, :- Pixels reverse, Reboot, Abort Reverse, Gigabyte,  Gloss Specialty Sheet Delete Cogs  Salvage strip from Bar Code, Key board sticker sheet and ESC sticker sheet 
Kaisercraft Dye, Mini cogs
Rub on for "Technologic
2 x Photos 5" x 4"

CUTTING:

Cut "Pixels" reverse 8" x 6" (leaving salvage intact)
Cut Reboot 8.50" x 5.50"
Cut "Abort" 1.5" x 8.50"
Cut  "Delete Cogs" 1.50" x 8.50"
Cut "Delete Cogs"1.50" x 4"
Fussy Cut Robot from "Gigabyte"
Dye cut small cogs from "Reboot" and "Pixels" reverse

ASSEMBLY:

Added salvage from "from "Bar Code" to the top of "Stone" card stock
Underneath added stars from the sticker sheet
Added photos to Reboot leaving 0.25" gap
Added photo mat to "Pixels" reverse leaving 0.25" gap at left side and top
Added strip of Alphabet to the top of Pixels
Added "Deleted Cogs" 1.50" x 4" 1.75" from the left hand side and 1.25" from the top
Added "Abort" 1.75" from the top and 2.50" from the left
Added   "Delete Cogs" 1.50" x 8.50", 2.50" from the top and 3.25 from left hand side
Added "Pixels" 0.75 from left and 3.25 from top
Next is to the embellishments
Take your dye cut cogs and using a mixture of each colour place at the bottom left of your photo Adding an addition of a robot from the ESC sticker sheet  
Add title from  Key board sticker sheet 
Add a mixture of other elements from the  ESC sticker sheet
Add the robot cut from  "Gigabyte" to the far right of photo
Use the Rub on cogs to the top right of your photo
See photo of layout for placement of the embellishments


Follow your Heart

Morning

My second post today is one i wasn't sure i would complete , as i could not think of a recycle piecesI have ponder this for quite some time . I did not just want  to use a piece of cardboardI knocked over my container with bits from my dye cuts that did not quite turn out and it came to be whilst picking all the bits up, what i was going to do it
I better tell you what the challenge is and who was it is  forSo the challenge is for "Off the Rails" scrapbooking blog spot


THE CHALLENGE IS: Create something using the mood board below and include a recycled item.


I think I have used most of the Colours in the Mood Board, I have recycled an Australia Post Bag with the cardboard and the bubble wrap which was inside a package i received on Friday
I have also used  the Salvage pieces from sticker sheets, most of my flowers are from bits of dye cuts which did not quite work out as they should have and so is the Qruatfoil Dye cut, I have used a scrap of "Blessings" which had a butterfly cut from it from a previous project, I throw out very little out.
It is a plain but simple layout and did not take me long to completed it once i had chosen my photo. 


MY INTERPRETATION:


PRODUCTS USED:


Kaisercraft "Wandering Ivy"  Collection :- Blessings and Blue Posy         
Kaisercraft "Olive" card stock 
Salvage from "Wandering Ivy" sticker sheet and  the salvage from the "Golden Grove"
The words come from both the sticker sheets of  "Wandering Ivy" and "Golden Grove"
Uniquely Creative Qruatfoil Dye
The base of the yellow flowers would have been a Sullivan Flower Dye punch
White Doily
Kaisercraft Yellow paint and blue Paint
Photo 4" x 4.75"

CUTTING:

Cut "Blessings 4.5 " x 5.25"
Cut "Blue Post" 5.75" x 6"
Corrugated card board "5.50" x 3.75"

PAINTING / STAMPING:

Using the Bubble wrap dipped in blue paint and stamped it 3" from left hand side from top to bottom coming in for 3"
Add yellow paint to top of corrugated cardboard

ASSEMBLY:

See photo for placement of pieces
"Blue Post" 5.75" x 6"5.5 from left hand side and 4" from the top


Sunday 28 October 2018

Aussie Christmas Card's


Grab our Badge - i create for


Afternoon all.

This second post is about an order i  received to make some more Australian Christmas card, whilst in the middle of the two cyber crops that i was trying to complete. They had to be in the mail on Friday. NO PRESSURE
(Yes they were mailed in time and yes i did finish the two cyber crops)

I only had 4 to make i already had the other two she wanted , plus another one i thought i would do as it had to be ready before the end of the month. I have not posted the picture of  it at this stage as it is for someone and they have not received it.

I used the Men on the Fence dye, May Gibbs stamp and Kasazz pens to colour them , I had  some  Koala's and Kangaroos left over from when i was making  the Napkin card so decided i would incorporate these bits. The paper background is from Kaisercraft "Open Road" Collection

I have also decided to use them as my third entry into the "Anything Goes Challenge", on the "Happy Craft Challenge blog spot

Cyber crop Challenges (5 challenges)

Hi Guys,

The weekend has caught up on us again and its been a while since i posted, last weekend i did two cyber crops  one had 5 challenges and a game of bingo (which is a lot of fun) and the other crop had three challenges plus their came of bingo as a busy , busy weekend and week. Thank heavens they gave us till Friday to complete
The One i will talk about on this post is for Anna's Craft Cupboard Face book Group


Their theme was "Going Old School: with 5 challenges


Challenge 1:  ENGLISH


Create a layout with a photo and tell us the story behind the photo with journalling  ( i love this challenge as recently been scrapping some old holiday snaps when the children were little) not much paper in this one. I have used  Kaisercraft "Hide and Seek" only had a few bits left from the paper pad

MY PAGE:


Challenge 2:  MATHS

Create a layout embellished by numbers. With this one decided to use one of my husband old school photo's . I thought it would be the perfect photo for going old school. I have used the Kaisercraft "Documented" collection

MY PAGE:


Challenge 3: BLIND CROP

Luckily the  blind crop did not  have too many steps, the photo below is the end result. I like this blind crop as no mixed media, Definitely going old school. If you want the instructions to give it ago you will find then on Anna's Craft Cupboard Face book Group under events. It took me around half and hour to complete.

MY PAGE:


Challenge 4: ART

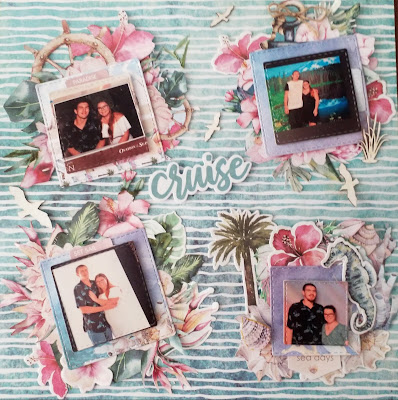
It’s time for some Old School Art, Delve into your art stash and create a layout or card showing us your brads, buttons, ribbons etc. ... show us your Old School Treasures!. i  thought this was perfect as i had recently created another layout for a different challenge and still had the second page to do as i had decide to make it into a double page. I have used Kaisercraft "Fairy Wishes" to create this
MY PAGE:


CHALLENGE 5: HISTORY

Create a layout using a sepia or black and white photo . In keeping with old school decided to do an old wedding photo of my father with our flower girl , a niece of my husband's . I do like the way this one turned out I used the Kaisercraft "Anthology" collection


MY PAGE:


Friday 19 October 2018

Discover Explore Nature

Afternoon all,


It's Friday, where has the week gone, a bit of sunshine today. I did get the washing dry and it's folded and put away.

I have been trying to blog  this layout for a couple of days, but life and  getting a decent picture made it difficult. I did take me a while to think about which photos i was going to use I decided on some very old ones. I have completed quite a large journal on the back of the page, due to the fact of the expansion of time, but thought these photos where right for this layout. I have taken a copy of them as well.

I think i have found a new favourite stencil ( i purchased as a clearance pack 10 for $20.00 it had large 12" x 12"  plus the 6" x 6") I love this Cris Cross one

The page is for Scrapbookit blog page:


Think NatureAdd texture, stencil/template, chipboard and circlesHere is the Sketch:


Image may contain: text


MY INTERPRETATION:


PRODUCTS USED:

Kaisercraft Mountain Air Collection, sticker sheet , collectables, Trunks, Outdoor, Spare Parts (reverse) and Adventure Mocha card stock
Imagnarium chipboard arrows
Kaszazz Alcohol Ink Marker in "Moss"
Uniquely creative Log Dye
Cris Cross Template
Ranger Texture paste
Ranger distress Crayon " Peeled Paint"
Burlap
Photo's 3 x 2.25" x 3.25"
1 x 3.25" x 2.25" (landscape)
"Bracket" Dye from "Outdoors
2nd largest circle from Kaisercraft stitched circles  


CUTTING 

Dye cut log dye from "Spare Parts" Reverse
Cut 4 x 3..50" x 2.50" from "Adventure (Photo Mat)
Dye cut 3.5" Brackets  
Dye cut circle   from "Strong Reverse"
Cut Burlap  6 x 4.5" and frayed edges
Fussy cut a section of "Trunks"


STENCIL AND COLOURING:

Coloured 12 arrows using the Kaszazz Alcohol Marker  in Moss
Added ranger Distress Crayons  in "Peeled Paint'  to the texture paste      
Applied through the 6" x 6" Stencil    to the top left hand corner of the "Mocha" card stock
Repeated process for 3" below and 3" to the right

ASSEMBLY:

Add a fussy cut log to the dye cut trunk , then add a collectable Using foam tape
Add this to the Mocha card stock 2" from the top and 0.50" from left hand side
Add photo to mats
Added Portrait photo mat 4.25" from the top and 0.25" from left hand side
Added bracket 2.75" from left hand side and 2" from top
Added 2nd portrait photo mat 2.75" from left hand side and 53.75" from the top
Added Burlap  3" from the top and 6" from left hand side
Added landscape photo mat sitting it at the end of the frayed left hand side and 6" from the top
Directly above this i have added the portrait photo mat. both added using foam tape
Tucked dye cut logs under neath the "burlap". Tucked the circle dye cut under the portrait and landscaped photo's.
Added embellishments as per photo


Maureen - October Card Sketch (Aust)

Hello Everyone,

A bit drier here is the south east we had a few sun showers today and that's about all, still very wet under foot. Was up early and succeed to get my chores done before the builders started this morning, i think they thought it was going to rain.

This morning I completed a layout , a simple sketch one, will blog it later. With the layout I wanted to use my scraps of Kaisercraft "Chase the Rainbows", when i had finished a had a few bits left over, as well as  a couple of pages in the 6.5"paper pad, only need one sheet from there.
I saw this challenge early in the month when i  entered the single page layout, into the "Stick it Down" blog spot challenge. (there is a double page as well). The card sketch was brilliant for my left overs. Made two using the sketch , plus two more. Now no  12" x 12" paper left. pr sticker sheet. no collectables either 


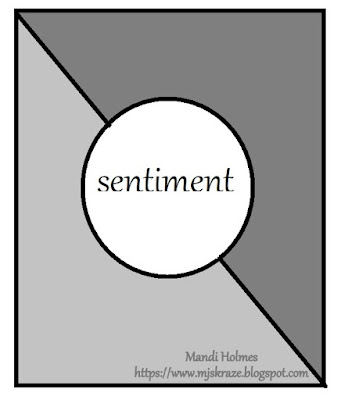
THE SKETCH:


October Card Sketch


MY INTERPRETATION:


PRODUCTS USED:

Kaisercraft "Chase the Rainbow" Collection:- Tint Reverse, Tone, Gloss sheet of Butterflies from 6.5" paper pad, Sticker Sheet
Paper Roses Australian Rectangle stitched Dye
Kaisercraft stitched circle Dye 
Cream card bases from my stash 

DYE CUTTING:

Dye cut  using the largest of the dyes 1 x butterflies gloss sheet , "Tint Reverse" and "Tone"
Dye Cut using stitched 6.5 cm circle dye from "Tone" and "Tint" reverse
Dye cut using stitched 4.5 cm circle dye from "Tint Reverse" and "Tone"
Cut your largest rectangles in half (corner to Corner)
This will give  you three card bases (I have only used two)

ASSEMBLY:

Using your to cut large rectangles add the "Butterflies" to top right of one and bottom left on the other base , then in the opposite corner add "Tint" reverse and "Tone"to  each of your card base leaving an eight of an inch boarder.
At the join point used a thin strip of orange and one of green from the sticker sheet.
Using foam date start with the graduating circles  (see photo ) for further details of what i  have used on each add these to the rectangles on each card base.
Add butterflies from the sticker sheet and circle sentiment to each of the cards.
Added a few gems to butterflies

YOU NOW HAVE TWO CARDS: 

These cards are quick and simple and can be made from any coordinating pattern paper

I actually made four cards from my left overs and used some of the bits from the paper pad for sentiments in just under and hour with interruptions.
Photo below:

Tuesday 16 October 2018

Good Times and Good Friends

Afternoon again

My second post this afternoon is another layout i started yesterday and completed this afternoon .Its time to turn the light on, the winds picked up and it looks quite black out there

The Layout is for the KRAFT Plus. There challenge was "FRIENDS"

I have used an old photo. My two best friends during the last few years at school then we all started working and dating and later on getting married and having children at the same time. They where both call Anne, although we never attended the same school, we played tennis together and hung out at each others homes during school holidays, and weekends went swimming and we all love to bush walk.


MY INTERPRETATION:


PRODUCTS USED:

Kaisercraft "Gypsy Rose" Collection:- Wanderlust, Doors, Inspiring and sticker sheet
Imagnarium Chipboard piece
Kaisercraft , Kraft card stock, Pink Pearls, Rhinestones in red, Rose dye
Gold Leaf which i added to a piece of scrap white card stock
Uniquely Creative tag dye
Photo  3.5" x 4.5"
Kaszazz  Cherry A 199 Alcohol marker
Mod Podge Dimen
sional Magic

CUTTING:

Cut photo mat 3.75" x 4375" from "Wanderlust"
Fussy cut flowers from "Inspiring"
 Fussy Cut individual  doors from "Doors"
Dye Cut Rose from Kraft card stock and Rose gold
Dye cut Tag from Kraft card stock

ASSEMBLY:

Using the Kraft card stock as the base added the large feather sticker (from the sticker sheet) to top left hand corner ensuring at this time feathers are not stuck down)
Using the fuss cut doors place one 0.25 from left and 3" from the top
added another fussy cut door 1.50" from the left with bottom of door meeting the piece of door previously added
Add photo to  photo mat 3.75" x 4375" from "Wanderlust"
Add photo mat using a strip of foam tape in middle 2.5" from the left and 3" from the top
Now add the doors to the right hand side tucking them under neath the photo (they should be 3" from the top and 2.75 showing from the photo mat to the 6" in length. 
Stick down feathers  that where add to the top right hand corner.
Add fussy cut flowers from "Inspiring to the left and right of the photo mat
Add the dye cut roses over them fussy cut flowers
Place a gem stone in each of the middle of the oink flower
Add the Small "Dream Catcher" from the sticker sheet to the middle bottom of the photo
Add journal tag at an angle to the "Dream catcher" (see photo)
Added squared from sticker sheer to right hand corner
Add the feathers to the right hand corner (see photo)
Add title" from left and 2.75" from top
Add gems stones as per photo
Colour the chipboard piece with the cherry ink add some  Mod Podge Dimensional Magic to give it a gloss look.
Add this piece 4" from left and at top of page


A Touch of Gold Cards (Aust)

Hi Guys

On, yet another wet day, presently the sun is out but looking thru the window the clouds are again gathering  for yet another down pour. (IT DID BEFORE I FINISHED THIS).

I  made these two cards yesterday whilst the rain was very heavy, so not much house work could be achieved, anyway the plumber was here putting muddy footprints everywhere, as they thought it being wet they do some more to the bathrooms. The jobs they had booked where outside jobs this week.The papers i used are left over from a layout i completed over the weekend and it was too good to throw away.A third of a 12" x 12" sheet. and just a few bits of the lighter sheet.


I am entering into a few challenge the first is for:


 Paru"s card making Challenge at:

                    http://paruscardmakingchallenges.blogspot.com


Our logo


Their challenge was a touch of gold


PRODUCTS USES :

Kaisercraft "Story Book " collection, History, and Paper Feature
Kaisercraft Gold Mirror Card
Kaisercraft Butterfly dye
Paper Flourish stitched rectangle Dyes
6" x 4.25" card base


CUTTING:

Used the largest rectangle, dye cut a pieced of gold mirror card
The graduated by two dyes and cut the next two pieces from "History"
Using the third smallest dye cut another piece from the History
Using the second smallest dye cut a piece from "Paper Feature"
Cut Butterfly from Gold Mirror card

ASSEMBLY:

Added the gold Mirror board to base, then continued to add the graduating sizes of "History" to the mirror board , add the "Paper Feature" then added the greeting

Add butterfly to the top and bottom corner of the third layer


SECOND CARD: 


I have used the same paper with same size card base, have adding square stitched dye cuts and  pearls


I have used the Largest  dye and cut from "History"
Graduated down by two, cut one rectangle from "Paper Flourish"
Cut two 1.75" squares from "History"
See photo for further details
Added rose gold gems in the 4 corners of "Paper Feature"
then added the two squares at an angle , placing gold butterfly in the middle
Adding sentiment in between the  squares


*********************************************************************************


I am also entering this in too:

"Anything goes challenge" on the : https://thehappycraftchallenge.blogspot.com

Sunday 14 October 2018

Our Heritage

Afternoon everyone,


It is a wet Sunday afternoon here is the south east of Queensland, we are enjoying much need rain, cannot do anything outside so time to hit the craft table and complete some more challenges at least it getting some old photos scrapped.I have again finished off another collection, This time Kaisercraft "Story Teller". There is just enough for a card which i will completed when i finished writing this up.

This challenge is for Mystical Scrapbooks Blog  and Facebook group


The challenge is Gypsy's Challenge:

Pick 3 elements from my page to use on your layout: here are some ideas for you... mixed up letters for your title, 4 patterned papers, washi tape, celebrate something small, journal on a card, photos that span the page, repeated stamping, vertical strips, yellow/pink/blue... or your own choice.


Gypsy's Challenge:
Pick 3 elements from my page to use on your layout: here are some ideas for you... mixed up letters for your title, 4 patterned papers, washi tape, celebrate something small, journal on a card, photos that span the page, repeated stamping, vertical strips, yellow/pink/blue... or your own choice.


My first choice was 4 patterned papers, washi tape and vertical strips..I think i have used more than 4 patterned papers so will go with Washi Tape, vertical stripes and  journal on a card


MY INTERPRETATION:


PRODUCTS USED:

Kaisercraft Story Teller Collection:- Anecdote, Anecdote reverse, History, History Reverse, Feature.
and Sticker Sheet
Kaszazz Alcohol Ink Marker A200 Crimson
Black and white striped Washi tape from my stash
God Washi tape from my Stash
Scrappy Cuts Chipboard words
Kaisercraft  Flourish dye and rose dye
Scraps of red cardboard
Mod Podge Dimensional Magic
Sheet of Card ( any colour will do)
Photo 3.50" x 5.50"


CUTTING:

Cut "Anecdote 12" x  8"
Cut " Feature 12' x 4" with flowers on bottom left hand corner
Cut photo mat 6" x  3.75" from "Feature"
Cut "History" 2" x 4" and cut a fish tail at one end
Cut "History" reverse 2" x 4" and cut a fish tail at one end
Cut "Anecdote" reverse  2" x 4" and cut a fish tail at one end
Cut  "History" 2"x  6"
Dye Cut  4 Butterflies from Black and white striped Washi Tape
Dye Cut 4 Butterflies from the Gold Washi Tape

ASSEMBLY:

Fussy cut around the flowers of "Anecdote" from 3" from the left till the 8" mark as photo will sit underneath
Add the piece of  "Anecdote 12" x  8" to spare piece of card stock Do not glue where the piece has been fussy cut.
Add  " Feature 12' x 4" Underneath
Cover join with row of blue flowers from the sticker sheet
Add photo to  photo mat 6" x  3.75" from "Feature"
Add photo so that it sits under your fussy cut flowers 4" from the left and bottom sits 4.5" from the bottom
Add fish tail cut from "Anecdote", plus "History" and "History " Reverse with points  sitting at 3" from the bottom
Add photo so that it sits under your fussy cut flowers 4" from the left and bottom sits 4.5" from the bottom
Add "History" 2"x  6" to the right hand side of photo mat tucking it under the photo mat
Now time to embellish, see photo for layering. and adding of other items
Using the flowers from the sticker sheet (I had remnants of two sticker sheets) cut them up and layered across the top and the left hand side using a rose which had been dye cut and the flourish dye with  a few of the flowers and the other blue rose strip


Saturday 13 October 2018

The Ocean is Calling

Afternoon all,
A lazy wet weekend. I decided  no housework today, to many wet footprints coming in. So got to crafting early.  I had already decided what challenge i was going to do next , a sketch challenge  for 


Anna's craft Cupboard face book page.   https://annascraftcupboard.com.au


 I had been Humming and Haring about what i was going to do I think the Halloween theme scared me a bit , as i am not into Halloween at all. In the end i was please with the way the page came together.


 SKETCH:


MY INTERPRETATION:


PRODUCTS USED;

Kaisercraft Beach Shack Collection:- Pier,  Boardwalk, Collecting (reverse), Mother of Pearl, Collectables, Sticker sheet and Wooden Flourishes.
Kaisercraft Summer Splash collection:- Swell and sticker sheet
Kaisercraft Sea Breeze card stock
Kaisercraft dots embossing folder
Liquid Pearls in Duck Egg Blue
Kaiser fusion Alcohol marker  A05
Kaszazz Alcohol Marker - Ice Blue
Uniquely Creative Scribble interlocking circle dye (large)
Brother Scan and Cut
Photo 5" x 4"


CUTTING:

Tear  a 4.25" X 12" piece from "Boardwalk" should be uneven
Tear a piece of 5"  x 12 of "Swell" (tearing the piece from the top of page as want to use the light blue)
Tear a  2" x 12" piece of Collecting reverse 
Dye cut 2 x Scribble  Interlocking circle dye from "Swell"
Using my scan and Cut, I scan a Dolphin shape then cut 4 out using "Mother of Pearl and added liquid pearls for eyes 
Cut Sea Breeze card stock 5.50" X 4.50" embossed with the "Dot" Embossing folder


ASSEMBLY:


Using "Pier" as my base but turning it so the dark brown strips are at the bottom of the page
Added "Boardwalk" to the top of "Pier" (The piece of Boardwalk had two tears at the top ) using the alcohol markers coloured these 
Using the two Alcohol Markers i coloured around the torn edges of "Swell"
Added it to the "Boardwalk" at the 4" point from top
Coloured around the  torn edges of "Collecting"  (Reverse) using the Alcohol Markers
Added to page at the 8.5" mark
Added the photo  to the photo mat.
Added mat using foam tape  2.75" from the top and 4" from the right hand side  to the page
See photo for placement of embellishment. I have placed a scribble circle dye at the top right hand corner and bottom left hand corner then at the bottom i used the two piece of coral from the sticker sheet with foam tape over the circle.
The little fishes are from the  the "Summer Splash " sticker sheet
THe three dolphin's i added to the top right hand corner is a circle placment
Te fourth dolphin added to the top left of the photo mat  using the reverse sid so he is facing the other dolphins


Friday 12 October 2018

LOVE THIS (Australia)

Afternoon all.

How is everyone on this wet Friday afternoon? It has cooled down considerably from yesterday. Thankfully we where not effected by yesterdays horrific storms here in South East Queensland. My heart goes out to the people who where.

This morning i sat at my craft table wondering what i was going to do with this challenge
THE MAIN COLOUR WAS ELEPHANT GREY , plus white, plus a sketch from another challenge page STICK IT Down Blog spot. White with One has joined forces this month with them

White with One it really  a challenge in its self  as you focus on the white and incorporate just one other colour.(not use a lots of colour like i usually do)

Searched through a couple of different collection and found what i wanted, I was thinking about cutting out elephants , no changed my mine, and went for hexagons. A more boyish choice for the photos i was using.


White with One blog spot  and Stick it Down blog spot

This month we are doing something a little different - that is a combined challenge with Stick it Down.  We will be using their sketch and they will be using our colour - combine them both and you can enter not only our challenge here on White..with 1 but also their challenge on Stick it Down for double the chance of a win.


No automatic alt text available.Combined challenge with Stick it Down


MY INTERPRETATION:


PRODUCTS USED:
Kaisercraft:- Grey and White card stock Black and White paint

Kaisercraft Sage and Grace "Render"  Factory 42:- "Machine" (Reverse),  Sticker sheet, Collectables, Wooden flourishes,  and Base coat IV :-" White Marble" Reverse
Sullivan flower punch
6" x 4" photo landscape
2" x 2" photo Portrait


CUTTING:

Cut 6 x 1.5" hexagons from each of "Render", "Machine" (Reverse),"White Marble" ( Reverse), grey and white card stock
Cut 6.25" x 4.25" from White card stock
Cut 2.25" square from white card stock
Cut 6.50" x 4.50: from grey card stock'
Cut a 2.5" square from grey card stock
Cut a 1.25" x 2.25" rectangle from white card stock
Dye cut one flower from "Render"


PAINTING:

Mixed  white and black paint to make the grey, Covered two cogs in paint mixture, when nearly dry dab white paint on each .

ASSEMBLY:

Added the grey ruler from the "Factory 42" Sticker sheet vertically at the 7"mark
Added the salvage from the sticker sheet where the cogs are and rang it horizontal at 9" mark
See photo layout for placement of hexagons, ( placement worked out my marking of where the photo's would sit
Added the white to the grey on both the  large and small photo mats
Added the photos to mats'
Place the larger mat at 3.5" from the left hand side and 3.25 from the top
The smaller photo added 6.50" from the top and 1.75" from right hand side
Using the small hexagons from the "Factory 42" sticker sheet cut them individually and set them around the larger hexagons as per photo of lay out
Added title from the  "Factory 42" sticker sheet  to 1.25" x 2.25" rectangle from white card stock then add it 7.25" from the top and 5" from left hand side
The two embellishment at the bottom left hand side of the first photo
Added the pulleys from the collectables at an angle at bottom of photo add dye cut then the larger cog and then the smaller painted cog
On the bottom right hand corner I have added a large white paper cog from the collectables and then small grey to the centre then the  sentiment