Tuesday 30 April 2019

Playing in the Dirt


Afternoon all

Its been showering on and off all day, and very cloudy

I have been busy completing  layouts for 2 cyber crops  that iI participate in last weekend and forgot to post this page which i completed for the challenge over on Archi -Scraps, late last week


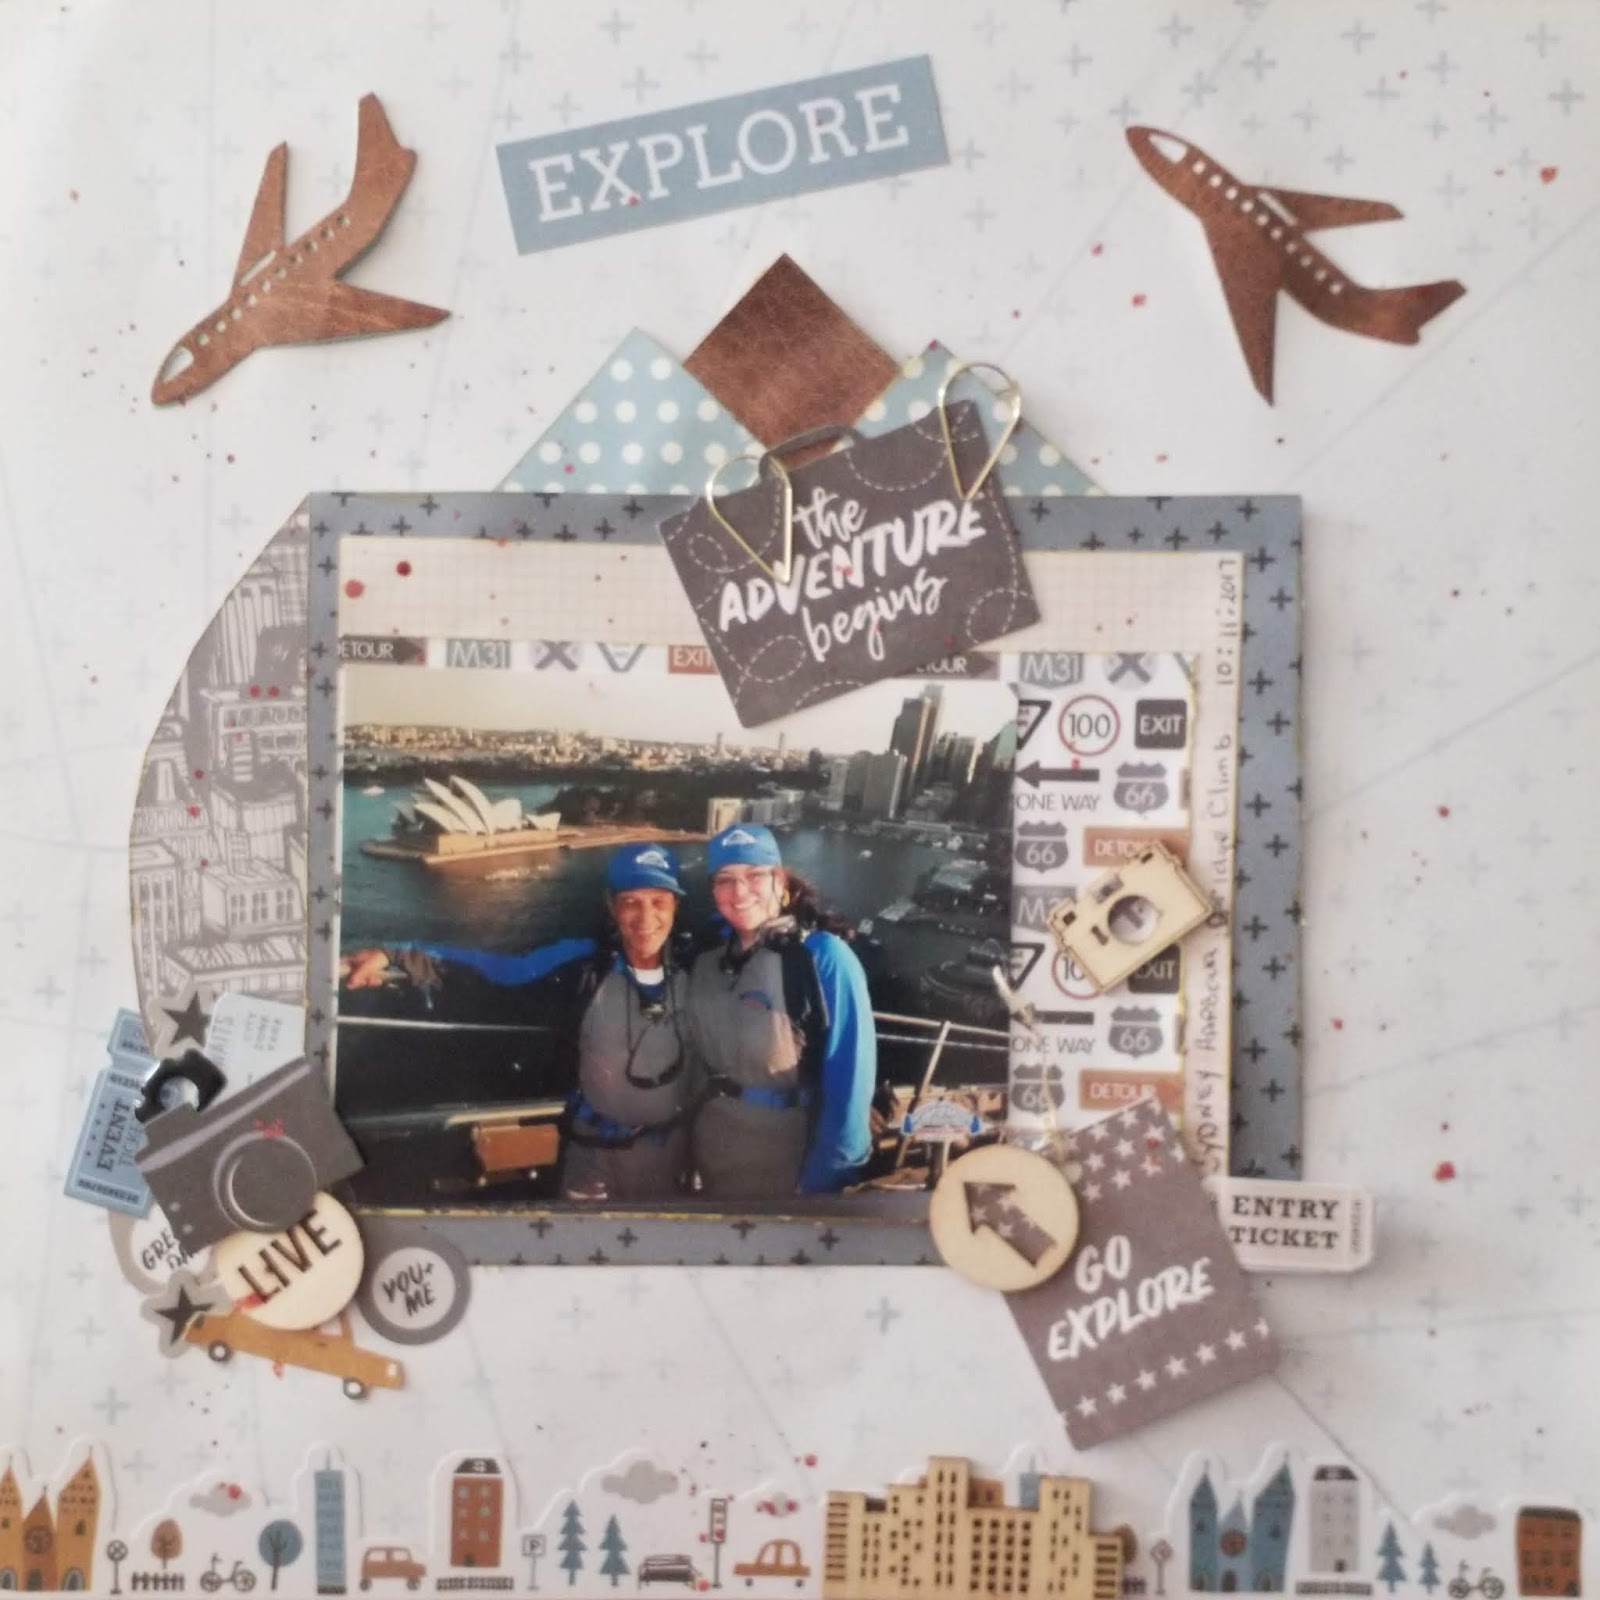
The challenge was :        SQUEEZE SOMETHING IN BETWEEN.

I have used a Kaisercraft collection called "Old Mac"


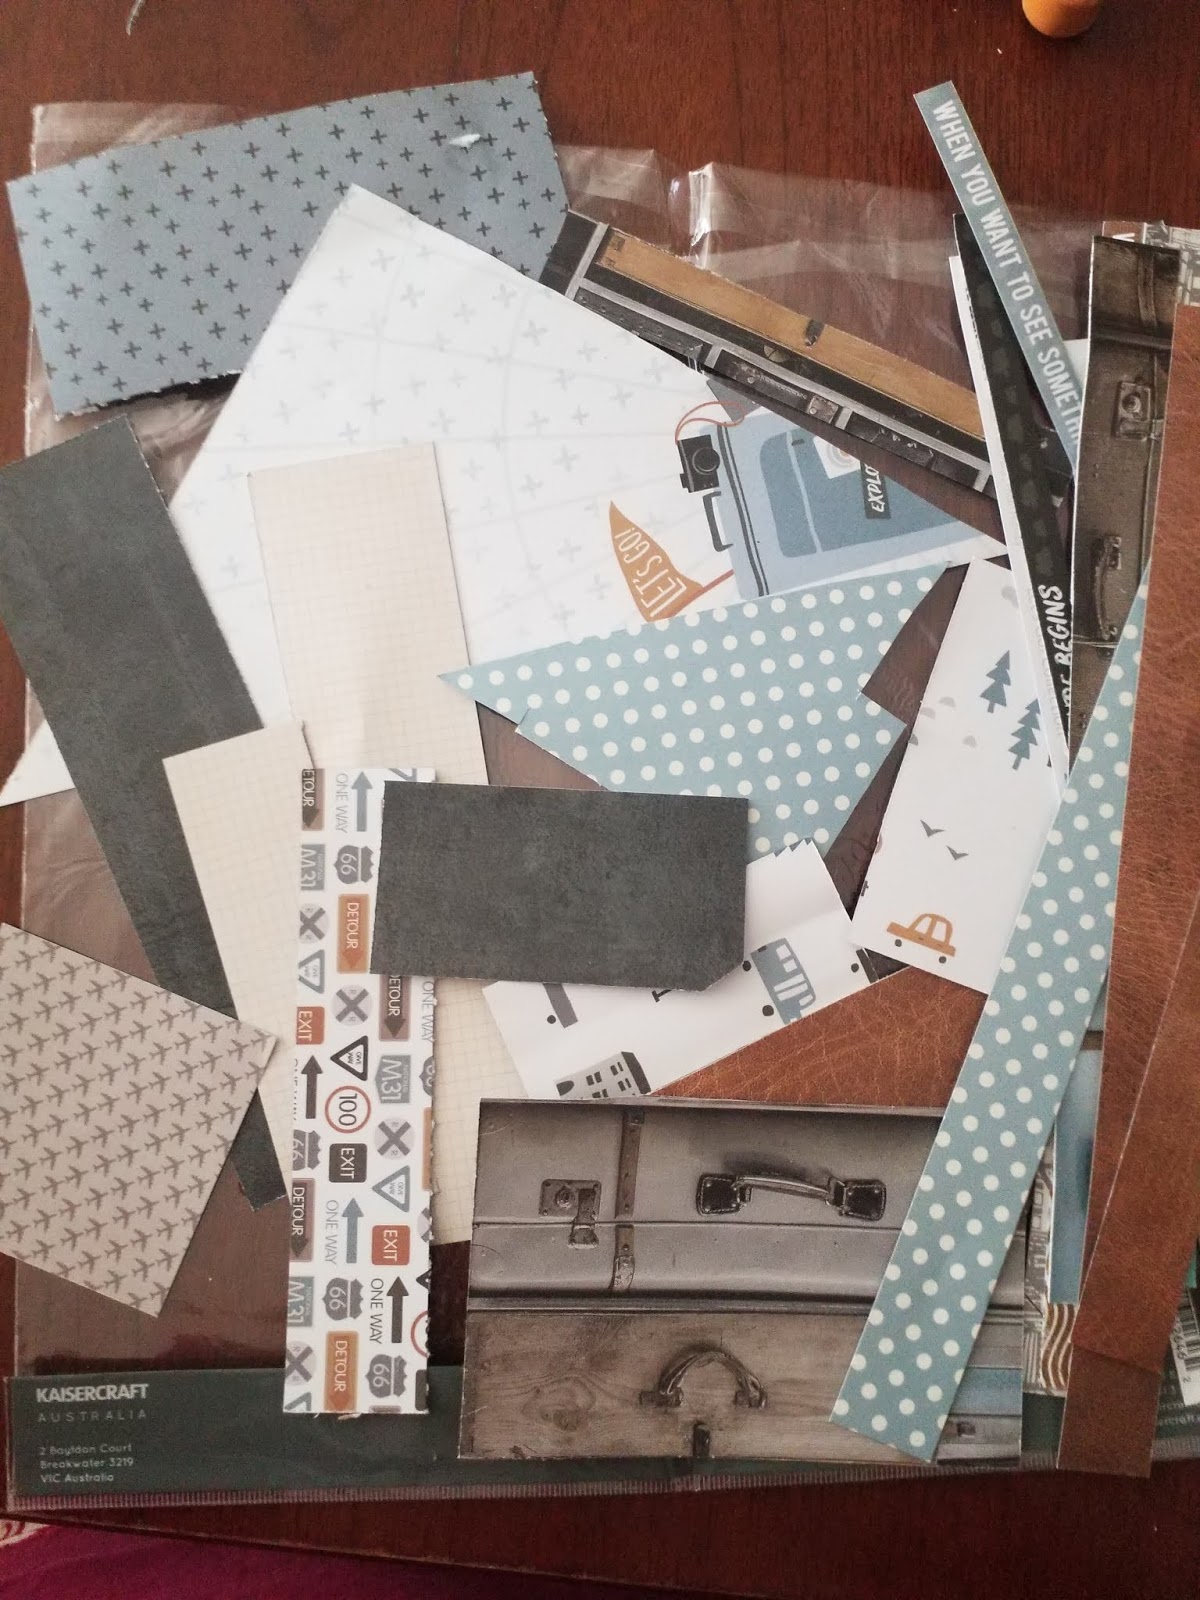
I have used bits and pieces left over, the base is actual from Kaisercraft Base Coat IV Collection, as i did not have any full sheets left. i have been using up from my old collections

I feel i could not get anything more in between the two tags , the photo was originally a 6 " x 4"  photo,  had to cut it  down to 3.5" x 4" to fit

I have used lots of collectables and the sticker sheet " Cowhide", " Country side" and "Flanno" papers. Corrugated card board, string and hessian with two orange Hessian flowers

Running out of time to be able to add all the cutting instructions, if any one wants them send me a message and i can forward you some written instructions.
Hope you like my page

Monday 29 April 2019

Monday's Inspirational post

Good Morning Everyone

Hope you all had a good weekend, its been a beautiful weekend , we were  up early this morning for the farmer's market, need fresh eggs and brought lots of fruit as well
Its 5.30 pm and darkness is closing in, winter will soon be upon us.


I need to make some Birthday  cards for my stash as i have very few left so decided to take Inspiration from Megan's sketches she has  posted over the the last few weeks and my take on her live card creating in pink Z fold card

I have used Kaisercraft "Fleur" collection and collectables and 2 x 6" x" 4" card bases and a 6" square card base for the Z fold

I hope you gain some creativity inspiration out of these . The first one i created,  I will definitely be doing  some more of these , love this design, it was so easy to make with a little bit of ribbon some squares and bling.


INSPIRATIONAL CARDS:


The second one was a well, very simple card of 2 larger paper layers and two oblong layers with sentiment and some bling, I decided not to go with the Star as the background paper was to bright.


The third pretty in pink card was also simple with lots of use of the collectables to create the front and back panel


COPY OF SKETCHES:


Saturday 27 April 2019

Be Fearless, Be Bold + Be You

Hi all,

Its quite warm all though cloudy today, spent a few hours yesterday fussy cutting flowers for my layout entry into Uniquely Creative bi monthly challenge.
I had a friend thread my sewing machine, cannot see the hole to thread it these days.
Up early this morning , the garbage truck woke me, (collecting rubbish from the school). Around 5.30 A.M. When I finished my usual morning routine, hubby
was still asleep so decide to stitch each of the pages.

https://www.uniquelycreative.com.au/single-post/2019/04/01/April-Sketch-Challenge

I had water coloured my base , i was originally going to do a layout from the kit box but since my stripes on one page were thinner decided to do the sketch one instead. Have cut all the other bits for the other one, so will  get to that one soon.

MY LAYOUT:


THE SKETCH:


PRODUCTS USED:

Kaisercraft Paisley  Days - Soul, Soul reverse, Smiles, Boho, Positivity. Collectables.
Kaisercraft Black  and White card stock. Kaisercraft  Green and Black ink and Gold Kaiser misting spray.
Uniquely Creative,  wooden flourish , Paints :- Prussian blue, orange, olive, lemon and black., Wording from the cut apart sheet, Small Grid Stencil.
Yellow cotton


CUTTING: PAINTING: SEWING: STENCIL:

Paint thin stripes horizontally across the white card stock 9 times in total

Cut "Soul" 6" x 9.5"
Cut "Soul" Reverse 6" x 6"
Cut "Smiles" 6.5" x 3.25"
Cut photo mat 5.25" x 3.75" from black card stock
Cut title mat 1.5" x 4.25" from black card stock
Cut title from cut apart  sheet
Sew a zig zag stitch around the edges of these cut pieces and also the white painted card stock
Fussy cut 2 large flowers from "Positivity" and 3 leaves from "Boho".
Colour  4 sets of flowers, i used orange yellow and pink using your water colours
Dye cut three sets of foam flowers from lemon and white foam
Using the " Small Grid" Stencil and green ink. Stencil the piece of "Soul" 6" x 9.5"


ASSEMBLY:

Add "Soul"  to base 1" from top and 1" from right hand side
Add "Soul " Reverse 4" from the top and 3.25" fro  right hand side
Add " Smiles" 2.5" from  the right hand side and 5.75" from the top
Add photo to mat
Add title to mat
Add photo mat to page 3.25" from left hand side and 4.75" from the top
Add title mat to page 0.50" from the left and 9" from the top.
Check photos of layout for placements of embellishments .

Wednesday 24 April 2019

Spring has Sprung (Maureen W.) Aust


Good afternoon,

Its a bright sunny  day here in the south east, after a wet Easter weekend, i done a few loads of washing and the towels are blowing in the breeze. Its a nice 25 degrees.
I thought i get this blog post done before i had some lunch.


I cut the pieces of paper for this  challenge layout for"The Studio Challenge" out yesterday and just need to put it together this morning. The layout was about the word  "SPRING" and using the letters for each piece on your layout.


The letters i found the most difficult where I and N.


MY LAYOUT:


This is my interpretation of the letters

S: Stencil (Kaisercraft Wood Grain), Stamps (Rare Earth), String, Square and   
Simple Stories " Tree Trunk Paper.

P: Patterned Paper (Kaisercraft Memory Lane), Petaloo and Prima Flowers, Polka dot green and white paper, Pink Pearls, Paint Medium- modelling paste, The word PERFECT and  Pearl drops in emerald green

R: Rose dye, Rhinestones, Roman Numerals (clock face) Roses paper

I:  Ink in Red and Green

N: Nuvo crystal drops in Honey Gold, Numbers in the date, Nature (tree trunk paper)


G:  Green Butterflies, the words: GRATEFUL, GORGEOUS,GREAT DAY, Green leaves,green flowers and Green paper


PRODUCTS USED:


Kaisercraft:- Memory Lane" Collection:- Misty Rose, Frost, Frost Reverse and Mint Blush, sticker sheet words  and wooden flourishes
Simple Story "Trunk" Paper.
Petaloo and Prima Flowers,  
A Mothers Art Butterflies
Nuvo crystal drops
Rare Earth Stamps;_ Saying and butterfly 
Kaisercraft Wood Grain Stencil pink pearls and gemstones and red and green stamp ink
Modelling Paste.
String brown
Kaisercraft "Rose Dye"
Green Card stock  from my stash
6" x 4" photo mat


CUTTING


"Misty Rose" base 12" x 12"
"Frost" reverse  cut  7" x 5" Photo mat
"Frost" cut 2.5" x 12"
"Mint Blush" reverse 5.5" x 11" cut fish tail in one end
 "Tree Trunk" cut to 5" x 12"


ASSEMBLY:

Stencil "Tree Trunk" using the wood grain stencil and modelling paste which has had a tinge of green ink added.
Add Fish tail of "Mint Blush Reverse"  to base of "Misty Rose"  3.25 from top and hard against left hand side
Add "Tree Trunk"  to page 1" from LHS and hard against top of page
ADD "Frost" 2" from left hand side and hard against top of page
Add photo to mat  leaving 0.50" margins
Add to page 0.50" from the left and 3.50" from the top
Add embellishments as per photo


Monday 22 April 2019

Mondays Inspirational Post

Hi Guys 

Monday morning of a lovely long weekend, Hope you have all  had a Happy and Safe Easter. Its been a bit wet here since Thursday in the South East, today it is clear and dry , but still a bit wet under foot for people doing those Easter egg Hunts. Our daughter sent through some lovely photo of the  great grandchildren and their Easter egg hunt this morning.  Sadly they live to far away for us to be present.  

What can you make from just this you say?


My Inspirational post this morning is my first attempt at a One Sheet Wonder set of  cards from a  6" square  piece of paper

I have never made cards so quickly it took me 45mts to create the four cards, the longest part of the process was to assemble the collectables 
The sketch below gives you the base cuts, the 2" x  0.75" left over pieces, i have used as part of one of the cards

I hope you will give them a try.

MT TAKE:


WHAT  I USED:

One sheet  of paper from Kaisercraft Miss Betty Collection (Small Paper Pads)
4 card bases
Embossing folder (Unknown Brand)
Collectables from Kaisercraft Miss Betty Collection
A Mothers Art  Butterflies 

I have added a You Tube video  (not mine) and another link where they go thru the steps to create the four cards. HAVE FUN!!!

 Lots more links on both You Tube and Pintrest


One Sheet Wonder Template

thttps://www.youtube.com/watch?v=FgwQAa0O1vI

Blog Post with more details and samples -https://iteachstamping.com/2017/…/one-sheet-wonder-

Tuesday 16 April 2019

You are Paw Perfect (Maureen W) Aust

Good Morning

On this glorious Tuesday, a cooler then normal start to the day which has lead to clear blue skies, although they said it would rain today
I am off to Toowoomba to spend some time with the grand kids this afternoon, much cooler up there

I thought i do the challenge for  Artastic

This month our inspiration comes to you by Lisa Frances Judd with "Cracked cats at home".

I have used lots of small off cuts from Kaisercraft "Scrap Studio" collection to create this as trying to use those last little bits

MY TAKE ON THE CHALLENGE:


PRODUCTS USED:

Kaisercraft Paw Pawfect- Dog clear stamps set
Kaisercraft, Brown and Red ink
Kaisercraft "Gypsy Rose" Wanderlust
Kaisercraft "Scrap Studio":- Torn.Worn, Worn Reverse, Expression, Expression Reverse, Frayed. Sticker Sheet
Kaisercraft "Tea Break" Alpha's


No instructions for this one as just keep tucking the pieces under my photo mat till happy with outcome

Used the paw prints to make a circle around the photo

Monday 15 April 2019

DT Inspirational Monday post (Explore)

Morning guys,

Its Monday already where has this past week gone, We had a perfect weekend, clear crisp morning a beautiful Autumn days.
For today's post I decided to used some scrap bits from Kaisercraft "Let's Go" my packets with just scraps seem to be accumulating .I have no full sheets but was able to make a base sheet from the bits and pieces. I did have a piece from the "Just Landed" in this packet.
Hope this inspires you to use up those little bits, that we cut bits out of , none of my photo bases are the sizes i will add below there is bits cut out of the middle .
My angles at the top where part  of triangles, the buildings on the left was a  quarter circle. I had cut the planes out previously and left them in the collectables container. I had a little bit of the sticker sheet remaining which helpeda great deal to fill in the base page.


MY LAYOUT:


PRODUCTS USED:

Kaisercraft "Let's Go":- Street Sign, Street Sign reverse, Cities Reverse, Cities, Carry On, Sight Seeing. Collectables, Sticker Sheet and Wooden Flourishes 
Kaisercraft "Just Landed" Collection Baggage Reverse
Kaisercraft dye "Planes"
Gold Paper clips from Uniquely Creative December kit
Kaisercraft Mist in "Gold"


CUTTING:


 Photo Layers
Cut "Signs" Reverse 7.25" x 5.75"
Cut "Baggage" Reverse 6.50" x 5"
Cut  "Sighting"6.50" x 4.25"
The Building at left of photo layers quarter of  a 10" circle
The arrows at the top of photo mat are 1.25" square  from "Sightseeing" reverse
the two other triangle in the blue "Carry On" are1.5" x  3" triangle
The base is "Cities" made up of several pieces and a row of house from the sticker Sheet. Normal you would use a 12" x 12" piece


WHAT I STARTED WITH:


WHAT I STILL HAVE LEFT:


Saturday 13 April 2019

Sunshine (Maureen W) Aust

Afternoon All


A beautiful day here is the south East, not to hot so have been sitting here scrapping. I have complete the single page sketch layout for Stick it Down this afternoon


April Single Page Sketch


MY INTERPRETATION:


PRODUCTS USED:


Kaisercraft Spearmint Card stock
Red card stock from my scraps
Papercraft magazine free paper from "Tattered Lace"
Gold Gems from my stash
Uniquely Creative Word dye "Sunshine"
A Mothers Art Butterflies


CUTTING:


Cut the paint splatter paper 6" x 12"
Cut the red butterfly paper 4" x 12"
Fussy cut flowers from the floral sheet
3 x 2" x 3" photo's
Cut 3 photo mats 2.25" x 3.25"
Dye cut the word "Sunshine" from red card stock


ASSEMBLY: 


Add the splatter paper to the spearmint card stock 3" from the left hand side and hard against top
Add the "Red butterfly" paper 4"from the left and  hard against top
Add photo to mats
Add  first mats to page 1.25"  from the top and 5" from the left  use foam tape
Add second mat to page 6" from left hand side and 0.25"from bottom of last photo use foam tape
Add third photo to page 5" from the left and0.25 from top of second photo use foam tape
Create flowers cluster around the middle and top of bottom photo as per copy of the layout using foam tape
Add gems to flower middle
Add butterflies as per photo
Add title 2.25" from left and 0.75" from bottom (see photo for further details)


Friday 12 April 2019

Easel Card (Maureen .W) Aust

Good morning

Its a clear crisp morning, just wanted to do this post before i headed out for today, busy day ahead with no craft for me today'

I was asked to make this card for a friend , she had chosen the papers for her daughter who is launching a new website next week. Butterflies and moths are her daughters loves.

I decide to do an easel card ,


MY CARD:


THE CARD LYING FLAT:


PRODUCTS USED:


Kaisercraft Anthology Collection:- Entomology and Botanist Reverse. Sticker Sheet 
Imanagarium Butterfly large
Kaisercraft  Green stamp pad Ink
Kindy Glitz in Silver
Kaiser craft Kraft Card stock


CUTTING AND SCORING:


Cut Kraft  Card Stock 11 " x 5"
Cut Kraft Card Stock 5" x 5"
Scoring at 2.75" and at 5.50" and forming mountain folds
Cut "Botanist" 4.75" x 4.75"
Cut "Entomology"  5.25" x 4.75"
Cut "Entomology" paper"5" x 3" used at back of top panel so can be seen on back side
Fussy cut 5 flowers from "Botanist" paper  to layer front of card (one with leaves )
Fussy Cut 8 moths / Butterflies from  "Entomology"
Colour Butterfly with green stamp pad ink, once dried add the "Kindy" Glitz
************************************************************


Entering in the Following Challenges:


https://letscreatechallenges.blogspot.com/ Use a Butterfly / Anything Goes

https://lovetocraftchallengeblog.blogspot.com/ Anything Goes

Wednesday 10 April 2019

WOW (Maureen W) AUST

Morning all

Where did Monday go, Its actually Wednesday morning forget about Tuesday life got in the way, so i did not get a chance to complete this post  after a crisp  early morning, a warm and beautiful day followed. Today Wednesday it's overcast and cloudy here in the South East.
Washing, dry really  quickly on Monday also  made some chutney as we received lots  of tomatoes to many for just us, gave away a fair few as well. Another batch tomorrow.did not quite happen  may be today.
I thought i sit and do the challenge layout for Lets Get Sketchy whilst the chutney was simmering away.  ( ended up making 18 jars). I planned out what i was doing the previous day and all my bits had been cut.


I have used an old Kaisercraft Collection from 2013


THE SKETCH:


MY INTERPRETATION:


PRODUCTS USED:


Kaisercraft "Fly Free" Collection:- QT, BF, Friend.
Kaisercraft "Flutter" stamp and dye set
Brilliance Cosmic Copper stamp ink
Kindy Glitz  "Silver"
Kaisercraft Alpha stickers
Brother  Scan and Cut
4" x 4.25" photo


CUTTING:


Cut around the bird on "QT"
CUT a 9" Star from middle of "QT" using my Scan and Cut
Cut a 5" Star from "Friend" using my Scan and Cut
Fussy Cut 2 flowers from " Friend" Reverse
Cut photo mat 4.25" x 4.50" from "BF"


ASSEMBLY:

Add words  from Sticker Sheet to top and bottom of "QT "
Stamp second smallest butterfly in the gaps of the Star formation as oer photo.
Reverse the 9" star cut from "QT" add it back it cut out space
Add smaller star align with the top most point 3.25" from the top and 7" from the left hand side
Add photo to mat
Tuck mat under the bird  2.5" from the left and 4.25" from the top
Add strip of leaves from sticker sheet just above the bottom row of words
Add fussy cut flowers from "Friend" reverse and from the sticker sheet as per photo.
Add a couple of the coloured butterflies from the sticker sheet as pet photo.
Add the Kindy Glitz  in "Silver" to the flowers.
Add title using  Alpha's to the smaller star


Monday 8 April 2019

Mondays Inspirational post "Love"


Morning all,


Its all ready Monday, where has last week gone ".
A perfect weekend cooler crisp mornings resulted in those perfect days.
I have completed a shabby chic type layout for one of my wedding photos, slowly redoing my album.
I decide i would give myself a challenge of creating with just two pieces of  patterned paper and some fussy cut bits already in the bag and a few flowers from my stash plus the inevitable butterflies i used on everything or so my husband reckons.  I hope you like it. I am pleased with the results.


MY LAYOUT:


PRODUCTS:

Kaisercraft Romantique Collection:-  Parisian, Lacy , Lacy Reverse, Grand Reverse.
Scrap of White card stock
26" of cream gathered lace
Little Birdie Flowers
Pastime craft White Flowers
A Mothers Art Butterflies
Imaginarium Designs Words
Words from Sticker Sheet Rose avenue
Versa Mark "Narcissus" ink,
Brillance Pearlescent " Poppy"


CUTTING :

Ink all edges with "Narcissus" ink
Tear all edges top and bottom
Tear "Grand" Reverse top and bottom
Cut 2 strips x 1" from "Lacy"
Cut 4" strip from  " Lacy" tear edges on all 4 sides
Leaving a 6" strip, tear edges on all 4 sides
Cut lace in half
Ink Words using "Narcissus" then  "Poppy" when tacky
Cut white card stock to 3.25" ' 4.75"


ASSEMBLY:

Add 1" strip from "Lacy" to top and bottom of "Grand" Reverse to form a 12" base
Add the large piece of " Lacy" reverse 0.25" from the top and 3.25" from the left
Add lace to both sides of  "Lacy" 4.50" from the left and 0.25" from the top
Add photo to mat
Add to page 3.50" from the top, 4.50" from the left
Make a cluster from either the collectables or in my case the fussy cut peices from "Parisian"see photos below,
Add word
Add butterflies
Add title.


Friday 5 April 2019

Cousins (Maureen W) Aust

Good Morning all

Its a bright and cheerful sunny day, with an expected warm weekend, here in the South East. Beginning of school holidays, so hopefully it will be fine and warm for the next two weeks.

Today's post is the challenge layout for White with 1. The colour this month is Pink , plus they have a sketch as well.

https://whitewith1.blogspot.com

The photos are of our great grandchildren, the two Little's are a month apart.


THE COLOUR:


MY INTERPRETATION:


PRODUCTS USED:

Kaisercraft "Lavender Haze":- Jacaranda, Wisteria, Mulberry,
Kaisercraft white card stock, and scraps of white card stock
Kaisercraft Lace Tag dye
Ksisetcraft Pink ink
Kaisercraft,  Pink Rhinestones and White Pearls
Little Birdy Classic Elements :- Alpha
Large white Doily
White ribbon 0.25" wide  2" long
Craft Stall plywood Embellishments
2 x 2 .50" x 3.75" photos


CUTTING:

Cut 6" semi circle from "Jacaranda" include the white wording
Fussy cut Flowers from "Mulberry"
Cut 6.75" x 6.75" square from top of ""Wisteria"
Cut  3.5"x 1" strip out of the pink of the "Wisteria"
Cut 2" x 1" from the pink part of "Wisteria"
Cut  4" x 6" rectangle from white card stock
Dye cut  tag dye from "Wisteria" Reverse  cut it down to 3.25" x 1.75"
Colour wooden embellishments with pink ink


ASSEMBLY:

Add semi circle cut from "Mulberry" to Doily leaving the white lace part visible
Add title letters to 3.5" x 1" strip
Add date to the 2" 'x 1" strip
Add photos to white card stock leaving a 0.25" gap at the top and between photos
Add journal to tag
Add 6.75" square to white card stock (do not tape the right hand side )
2.25" from the left and 2.75 from the top
Add semi circle by tucking it under the rectangle glue into place
Add white photo mat  3.25 from top and 1.75" from left hand side
Add journal tag 5.75" from the top and  5.75" from the left
Add small rectangle with the date 3" from the left and slightly tucked under the large rectangle ( see photo)
Add title rectangle 2.50" from the top and 5.75" from the left
Add fussy cut flowers to the left of photo mat
Add pearls and rhinestones as per photo
Add wooden flower and word as per photo


Thursday 4 April 2019

Happy Birthday card. (Maureen W) AUST

Good morning.


Lovely cool morning here in the South East, but it looks like is going to be a lovely day, with that clear blue sky.
Yesterday afternoon after a raft of appointments till late afternoon, i thought i start my challenges for the month.  I Choose something quick to begin with ."The card sketch from "Stick it Down"


In my travels yesterday i picked up a magazine called "Papercrafter" with free stamps and the most gorgeous paper from Tattered Lace. Just thought it would be perfect for this card. The card with the mirror board greeting is hard to take a picture

MY CARD:


SKETCH:


April Card Sketch

PRODUCTS USED:

Tattered Lace free paper
Craft  4 You dye "Happy Birthday"
Paper Rose Stitched rectangle dyes
JEJE Gold Mirror Board Self Adhesive
Mothers Art pink Butterflies
6" x 4" white card base


CUTTING:


Dye cut "Happy Birthday" from Gold Mirror Board
Dye cut purple stripe paper using 10.5 cm x 25cm dye
Dye cut purple stripe paper using  10.2 cm x 5.8 dye
Dye cut purple Hyacinth paper using 8.3 cm x 13 cm dye
Dye cut purple Hyacinth paper using the 8.5 cm x 4.4 cm dye


ASSEMBLY:


Add the larger of the striped paper to card base
Add the larger of the Hycanith paper 1cm from top and 1 cm from left hand side, using foam tape
Add second piece of striped paper 2.3 cm from top and 1cm from left hand side, using foam tape
Add the second piece of Hycanith paper horizontally 1cm from the left and 2cm from the top, using foam tape
Add Birthday dye cut to base of smaller Hycanith paper
Add two medium and one small pink butterfly as per photo

Tuesday 2 April 2019

Christmas Card ( Maureen W) Aust

 Afternoon all


Showers today , have made a start on a few Christmas cards, i  need to do 60 by June. Was going to share a Birthday card but its been more difficult then i anticipated will share tomorrow.

The card today is made from Kaisercraft " Mint Wishes" Collection,  just using up the last of the paper pad. Have made 4 cards with a few other bits and pieces i had in my stash, but they are predominately "Mint" Wishes., using a 6" x 4" card base


I am entering this card into the following challenge

thehappycraftchallenge.blogspot.com

2craftycrittercrazies.blogspot.com

merrylittlechristmaschallenge.blogspot.com

.craftyhazelnutspatternedpaper.com

Monday 1 April 2019

Inspirational Monday D.T POST


Morning all,


WOW, its Monday already, wet Saturday and a glorious Sunday with very mild conditions over the  weekend, decide to tidy and rehouse a few bits and pieces , i want to shift my Scan and Cut. From my table. Sill there thou.

Today's post, Do you have a container  of scenic photos you have taken whilst  on holiday and you scrapped what you want, but they too good to throw the rest away. Why not turn them into photo cards

This is what i have done with some old photos from the Pilbara region of Western Australia, when we lived there. I have also  used Paper Roses " Men on a fence " Dye some dye cut kangaroo and wooden Flourish Kangaroo from  Kaisercraft "Open Road" collection.

Cleaning up today found some more photos of sunsets and aftermath of a bush fire many years ago of my brother in law horse paddocks. i will do as well in the near future.

All cards are a base of 6"  x 4" top fold cards


Hope you like them and to share some of your creations

Till next week.

MY CARD'S :