Showing posts with label Uniquely Creative kits. Show all posts

Sunday, 26 July 2020

Guest Designer Post. Week 5 Sketch :- Part of the Story . Lasting Memories

Morning All

A very wet last few days, but it is much warmer and we do need the rain. On Thursday we had the grass cut, hubby reckon it was warranted but I insisted glad I did as with the rain you can already see the growth.

Hope everyone is safe and well, hugs go out to people in lock down. Our state is relative free with only cases at this stage are people returning from overseas and who are already in quarantine.


This is the final Guest Designer post for "Lasting Memories Blog".


http://kcclayoutchallenges.blogspot.com/


I do hope you have received some inspiration from my layouts. I have kept them simple but as I love to fussy cut elements to match what I am doing, there is always some layering of elements


MY LAYOUT:


Add caption


THE SKETCH:

 3 Photo Sketch from PageMaps July 2019


Inline image


PRODUCTS USED:


Uniquely Creative "Mother Nature”: - Nature Strong Reverse, Proud Mama, Total Devoted, Protective Reverse, Florals, Cut Apart Sheet and Creative Cuts

Uniquely Creative Rhinestones: - Sunshine

Kaisercraft "Empire " Collection: Lava

Kaisercraft "Save the Date" Sticker Sheet

6" of 0.25" wide Orange Ribbon from my Stash

Photos 2 x 4" x 2.75 and 4" x 4"


CUTTING:


Fussy cut flowers from "Florals"

Cut "Nature Strong" Reverse 6" x2"

Cut "Proud Mama" 8" x 11"

Cut 3" x 11"

Fussy Cut Cluster of Flowers from "Total Devoted"

Cut Tag from "Protective" Reverse - Blue

Cut Black and White spotted tag from Cut Apart Sheet


ASSEMBLY:


Use “Lava" as your Base add "Proud Mama" 8" x 11" 0.25" from the top and 0.25 from left hand side

Add "Total Devoted" to "Lava" 0.25" from the top and 0.25 from right hand side

Add Strip of Orange Spots from "Save the Date" Sticker sheet over join

Add "Nature Strong" Reverse 6" x 2", 4" from the top and 4" from Left hand side, and 4" from the top, leaving top and bottom clear of tape

Add Photo’s: - First Photo 1.50" from the left and 2.5" from the top. Second photo leave a 0.25" gap and add directly underneath. Add the Third photo 4" x " 4.25" from the top and 2.75" from right hand side

Add the Black and White spotted tag 6" from the left-hand side tucking it under larger photo

Add the blue tag from "Protective" Reverse 4" from the top and 4.25" from the hand side

Add embellishments from the Fussy Cutting, Creative Cuts and cut apart as per photo.

The flower cluster has two layers.

Add Rhine stones and title


 THANKS FOR STOPPING BY

STAY SAFE AND WELL

HAVE A CRAFTY WEEK

MAUREEN


Wednesday, 27 March 2019

Adventure (Maureen W ) Aust

Afternoon all

Its a drizzle day here in South East Queensland, the temperature is sitting at 22 degrees, quite pleasant, and such right to sit comfortable at my scrap table to sit here and fussy cut, started yesterday on the fussy cutting  the flowers.

I decide today to the challenge for Studio Challenge  blog Spot.


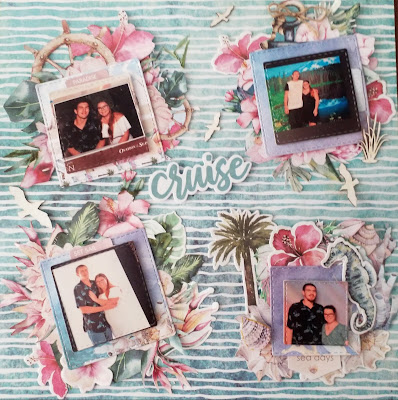
 The first monthly challenge is about fussy cutting. Anyone  who reads by blog will know that i love to fussy cut. Most of my layouts have some form of fussy cutting on them.  I decide to do another cruise layout using Kaisercraft Paradise found Collection


MY LAYOUT:


PRODUCTS USED:


Kaisercraft "Paradise Found" collection;- Salt Water, Salt Water( reverse) Palm Trees (reverse), White Sands, Chase the Sun and Collectables
Little Birdy Texture Sand
Uniquely Creative:- word from cut apart sheet, hessian flower strips  and cork sheet  from February kit.
Kaisercraft fusion pen R03 (Red)
Uniquely Creative Hibiscus  Out line Dye
Scraps of Red Card stock
Close to My Heart Gold shimmer brush.
Kaisercraft red gem stones
6" x 4" landscape photo

CUTTING:

Fussy cut flowers from "Chase the Sun", and "White Sands"
Fussy cut Shells from "Salt Water" (reverse)
Cut 8" x 11" triangle from "Salt Water"
Cut 6.5" ' 4.5"  Mat from Cork Sheet
Dye cut 4 red Hibiscus then cut in half
Ink Word using Fusion pen in red


ASSEMBLY :


Using "Palm Trees" reverse as base add "Salt Water" triangle to top left hand corner.
Add hessian flower strip across join
Add the row of fussy cut flowers from " White Sands" following line of join 1" from the top of join. Using foam tape
Add the dye hibiscus dye cuts and other fussy cut elements till your happy with the look , using photo for guidance ( i have three layers in most parts)
Add photo to cork mat
Add mat to page 5" from the top and 1.25" from right hand side tucking under flower cluster.
Add a sentiment from the flower cluster
Add glue then Texture sand to bottom of page (see photo)
Add the fussy cut shells  from " Salt Water (reverse) to the sand
Add gems to sentiment
Add title to top left hand corner
Using gold shimmer brush run thru stamens


Monday, 25 March 2019

Mondays D.T POST: PARADISE


Good morning all.

Where has the weekend gone, i know mine was was spent fussy cutting succulents  for this mornings layout.
Not a particular busy one, had a visit from some friends, it was very hot though . No storm.. Night time temperatures are dropping so more comfortable sleeping.

This weeks layout i used my kit i purchased from Uniquely Creative, Kaisercraft Green house Collection.. so beautiful. As most of this layouts fussy cutting and dye cutting, it wont me for every ones taste.


PRODUCTS USED:

Kaisercraft "Greenhouse" Collection:- Succulents, Terrariums, Yucca and Rosette , Collect ables and musk card stock. Bits of Kraft card stock. Pink ink
Scrap piece of mint coloured paper from my stash
Lace from Uniquely Creative March kit
Uniquely Creative  Succulent  outline Dye  and Paradise Dye and gold sparkle  pen.
Couture creations "Quaterfoil stencils
5" x 3" photo


STENCILING:

Using the pink ink and the Quarterfoil stencil,, form a diamond shape , starting from the top 3" in  form a 9" Diamond on the Rosette " paper which has been cut to "10 x 10"


CUTTING:

Dye cut title from musk card stock
Dye cut 6 each of the Succulents  outline dye set from the green and Musk card stock
Fussy cut all the Succulents  from both the "Succulents" and the "Terrarium " paper
Cut two small terrariums using the one in collectables as your guide from Kraft card stock


ASSEMBLY:


Add the "Rosette" paper to "Yucca" paper 1" from the left and 1.5" from the top.
Add flowers from your fussy cut pieces to the two small terrariums cut from Kraft card stock. Add some pick vines from your dye cuts.
Add to top left and right 0.25" from the top and 0.25 from both left and right hand sides see photo for further detail.
Using the below picture place your fussy cuts, collectables and dye cuts in a diamond shape. Adding a piece of lace at the bottom tip of diamond. Once happy with flower placement add foam tape or double sided tape.
Add the trailing vines in green add to left and right hand corners as per picture.
Add gold accents through out succulents.
Add photo to middle of diamond
Add Title