Showing posts with label Challenge layout. Show all posts

Friday, 5 May 2023

December Box: 3rd May All about Sketches - Cookin Up Creations

 Afternoon All


The second sketch Challenge for the month for Cookin up Creation. (3rd May)

http://www.cookinupcreations.net/forum/

New sketches will be posted each Monday, Wednesday, Friday and Saturday

With this one it was use the sketch and create our own background

I have used Stars and Red Pearls to create some images of  Red Berries


MY PAGE:


THE SKETCH:


PRODUCTS USE

Uniquely Creative "Sea Breeze Card Stock

Uniquely Creative "December to Remember: Hang the Decorations, Spirit of Xmas, Making Memories and Creative Cuts

4"x4" photo

2" circle Dye Uniquely Creative

Gems from my stash


THANKS FOR STOPPING BY

HAVE A CAFTY DAY

MAUREEN

Monday, 13 December 2021

Decorations (Maureen W) AUST

Morning  all

Its a beautiful  clear  blue skies today, much cooler than yesterday.  Although they have said showers today. 

I cut this layout out yesterday using scraps from a few different collection.  There is a bit of Kaisercraft and Uniquely Creative but not sure which collections they are so have not written any instructions . Found the frame last week when I was cleaning out my dye cuts.

The layout is for a challenge at Rochelle Spears , this is a sketch. I can also enter it in her Scrappy Friends bonus challenge  at Scrap with Stacy if I use her Tic Tack Toe Board,  which I have done. I have used the top Row: Frame, Enamel Dots and Tag

Why not join in the fun and get some photos scrapped

http://rochellespears.blogspot.com/

https://scrapwithstacy.blogspot.com/

MY LAYOUT:


THE SKETCH 


TIC TACK TOE BOARD:


THANKS FOR STOPPING BY 
MERRY CHRISTMAS 
HAPPY CRAFTING 
MAUREEN 

Sunday, 7 November 2021

Summer Maureen W (AUST)

 Morning  all

Although it will be afternoon  before I get to publish this, we off to Costco this morning with our son to purchase  afewitem  only go every couple of months its about an hour away , nice drive.

Its going to be a warm one today as well  with storms again this afternoon 

I have completed another page for our granddaughter cruise album.

This time it's coming into Auckland's harbour, in New Zealand. 

The challenge I am entering is for Week 1  Sketch  491 for Sketches in Thyme 

http://sketchesinthyme.blogspot.com/


MY LAYOUT :


THE SKETCH :


PRODUCTS USED:

Kaisercraft "Paradise Found" Collection:- Palm Trees and By the Sea Reverse

Uniquely Creative "Ocean Breeze ":-  Summer Days , Sun Set, Summer  Bloom,  Beach Life and Creative Cuts

2 6" x 4" photos 

String from my stash


CUTTING:

Cut 8.20" Circle from " Palm Trees"

Cut 7.50" Circle from  "By the Sea Reverse "

Cut salvage from "Summer Days "

Cut "Sun Set"  2.50 " x 12" 

Fussy  Cut flowers from " Summer Bloom"

Fussy cut Lighthouse, words   leaves and wood 


ASSEMBLY:

Use "Summer Days " as base, add salvage preciously cut off to bottom of page 

Add "By the Sea" to " Palm Trees "

Add to page 2" from the top and 2.50" from left hand side 

Add  "Sun Set " to the left hand side of  page using tape only on the far left of strip

On the right side of strip place foam tape but do not remove backing

Add photos  tucking in under strip of  "Sun Set" 2.50" from the left and 3.25" from the top 

Add fussy cut pieces,  Creative cuts,  over the floral pieces down left hand side  as per photo

Add title as per photo


THANKS FOR STOPPING BY 

HAVE A CRAFTY WEEK 

MAUREEN 


Sunday, 29 August 2021

"Hello School" : Lasting Memories No 563 DT post

 Morning all


Its Sunday morning cloudy and overcast.

Its time for the  new month Challenge over at Lasting Memories.

https://kcclayoutchallenges.blogspot.com/

The challenge this month will be all about pattern paper. I cannot believe its already nearly September and Spring here in Australia . Hopefully it will warm up soon as I am tired of the cold mornings in single digits and with the warmer weather it may slow down the number of COVID cases and help with Lockdowns. Although not in Lockdown as is many parts of Australia. We would still like to travel interstate and see our children . Enough about that it time to get on with the first weeks challenge: Use POLKA DOT paper on your page.

It was hard. didn't realise I only had scrap bits, so need to find something that would go with my sketch design. So out come the scrap box. I think it has worked well.


MY PAGE:


PRODUCTS USED:

American Craft "Bright's" Blue, Royal Blue and Baby Blue

Kaisercraft "Coffee Bean" Cardstock

Bo Bunny "Calendar Girl" :- May Reverse

Kaisercraft "2 Cool 4 School" Collection: Social Studies , Sticker Sheet 

Kaisercraft "Class of 87" Collection:- Assembly

Polka Blue and White spots unknown brand

2 Photos 6" x 4" and 4" x 4" 


CUTTING:

A: Cut "Royal Blue"  6.50" x 4.50" Photo Mat

B: Cut "Baby Blue" 6.25" x 4.25" Photo Mat

C: Cut "Royal Blue" 4.50" x 4.50" Photo Mat

D:  Cut "Baby Blue" 4.25" x 4.25" Photo Mat

E: Cut "Coffee Bean" 10.25 x 4" x  4.25"

F: Cut "Coffee Bean" 11" x 2.25"

G: Cut "May" Reverse 10.75" x 2.25"

H: Cut " Social Studies" 10" x  4"

I: Cut "Polka Dots Blue and White" 10" x 8"

Fussy Cut 2 x  Little Boys in Green from "Assembly"


ASSEMBLY:

Add  "B" to  "A" 

Add 6" x  4" photo

Add "D" to "C"

Add 4" Photo

Add "H" to "E"

Add  "G" to "F

Add "I" to base of "Blue" 3" from left hand corner and hard against top. with Bottom right hand 4" from the right (see Photo)

Add " E" 6" from the top 1" Left hand side

Add Green Salvage from the Sticker Sheet

Add "F" 0.25" from left hand side and 7.5" from the top

Add  6" x 4"   Photo 2.75" from the top and 2.25' from left hand side

Add 4" square photo  6" from left hand side and 4.75" from the top

Add Stickers and Fussy cut pieces as per photo


THANKS FOR STOPPING BY

HAVE A CRAFTY WEEK

MAUREEN


Thursday, 8 April 2021

GOOFY KITCHEN

 Hi Guys


It's a beautiful day, blue skies and the birds making a racket ,three loads of Washing swing in the breeze. First find day in over week.

This morning thought I catch up on Challenge 4 for the "CLUE GAME" for Cookin up Creations

http://www.cookinupcreations.net/forum

The criteria is hidden journaling,  since this is the last of my Granddaughters trip to Disneyland this challenge was perfect 3 photos left.

It was a quick easy layout it took me longer to find the last of the Disney paper Pack

I hope you like it

MY PAGE 


MY HIDDEN JOURNAL:


PRODUCTS USED:

Disney Paper Pack: Striped and Mickey 's head, 

Pedal power paper is from a used Birthday card (that was given to me)

Kaisercraft Card Stock: - Orange, Watermelon, White and Marrakesh

Uniquely Creative Black Upper Case  Alpha's 

Kaisercraft Lower case  Red Alpha's 

Disney Stickers 


CUTTING:

Cut " Marrakesh" 2 x 6.25" x 4.25"

Cut " Orange" 6.25 " x 4.25 "

 Cut " Watermelon " 12.50" x 9.50" leaving salvage on

Cut "Mickey Heads" 9 " x 6" 

Cut card 5.50" x 4.75"

Cut White Cardstock 4" x 5.75"


ASSEMBLY:

Using the stripe paper as base

Fold " Watermelon" card stock in half to form a card 

Add photos to mats

Add journal to white mat

Add 2  mats to out side of "Watermelon " card

Inside left of card add Mickey's Heads

Add the " Pedal Power" card 1.75" from the top of card and 0.75 " from the left of the inside right of card

Add last mat and journal mat below leaving a gap of 0.25"

Add to page 2.50 " from the left and 1.5" from the top

Add embellishments and title as per photo 


THANKS  FOR LOOKING

HAVE A CRAFTY MONTH 

MAUREEN

Wednesday, 20 January 2021

Good things (Maureen W) AUST

 Morning all 

We're in for another warm day, presently we have a cool breeze which is keeping the temperature down although it's still early

Meant to blog this yesterday but time got away, had a couple of appointments which took the morning away  then I had a snooze as I did not get up from my chair after lunch.

Todays layout is for a challenge over on "The Studio Challenges" blog.

The criteria is out with the old in with the new

http://thestudiochallenges.blogspot.com/

I have used the last of "Mother Nature" I had lots of strips the paper s from June 2019, My something new is the doilies which Uniquely has just starting to produce this year and my new Alcohol Markers from Kaiser and my packet of Anko Pastel Cardstock which I received for Christmas. I have not purchased any products so far this year except for my monthly Uniquely Creative kit.

I hope you like how i have used my scraps up hate waste.


MY PAGE:


PRODUCTS USED:

Anko Cardstock in pastel Blue

Uniquely Creative "Mother Nature" Collection :- Protective, Strong, Ever Selfless, Reverse, Totally Devoted, Fussy Cut Florals,  Creative Cuts,  Cut Apart Sheet and Water Colour Cut Apart Sheet

Uniquely Creative 3" doilies .

Sullivan's Flower Border Punch

A piece of Darker Blue Card Stock for Photo Mat

5.75" x 4" Portrait Photo


CUTTING:

Cut "Protective" 12" x 1" x 2 Border Punch one side of each strip

Cut "Strong" 2" x 12" x 2 

Cut  "Ever Selfless" Reverse 12" x 1.5" x 2 and  Border Punch one side of each strip

Cut "Totally Devoted" 4.5" x  4" and 

Cut Photo Mat 6" x 4.25"

Fussy cut flowers from "Totally Devoted" and  "Fussy Cut Florals"


ASSEMBLY:

Using Pastel Blue Card stock as Base add  strip of ""Protective" 1.25" from Left and second strip 1.25 from right

Add "Strong"1.75" from left and  second strip 1.75" from right

Add  "Ever Selfless" Reverse 3" from the left and  second strip 3" from right

Add  "Totally Devoted" 4.5" x  4", 4" from left hand side and 3.50" from the right

Add  "Totally Devoted"4.5" x 3.25", 3.50" from the right hand side

Add photo to mat add to page 3" from the top and 4" from left hand side using foam tape in the middle

Add Doilies under photo mat

Layer embellishments as per photo


THANKS FOR STOPPING BY

HOPE YOUR ALL SAFE AND WELL

HAVE A CRAFTY MONTH

MAUREEN


Sunday, 17 January 2021

Mad Hatter Tea Party. LM #531 Design Team Project

 Evening All


Today hasn't been as hot as yesterday, thank heavens. Its been a mild 26 degrees with rain overnight.

The theme for this month's Challenge for Lasting Memories is "Wheel of Fortune" our spin brought us to "Best Seller" Create a layout with a connection to a Book.

I have used photo's of our Granddaughter's 9th Birthday Party when her mother gave her a Mad Hatter's Tea party as her favourite book at that time was "Alice's Adventures in Wonderland" by Lewis Carroll. 

I hope you like it, and it gives you some inspiration to join this weeks challenge over at 

kcclayoutchallenges.blogspot.com


MY LAYOUT:


PRODUCTS USED:


Alice paper designed by Maria Taylor which was free paper in Cardmaking and Paper crafting magazine (I have used this for the Photo mats and the little envelope. 
Base Paper is from Kaisercraft "Miss Match" Collection from 2012
Tea pot buttons from my stash
Craft stickers

I hope you like my interpretation of "Create a layout with a connection to a Book"

HAVE A CRAFT WEEK
KEEP SAFE AND WELL
THANKS FOR STOPPING BY
MAUREEN

Thursday, 14 January 2021

Today I 'm One (Maureen W) AUST

 Morning All 


Another lovely warm day.

Another page I did over the 3 day  weekend virtual retreat whilst in lockdown. I still have a few to blog.

This one is a sketch for Sketches in Thyme

They have a weekly sketch this is the second time I have entered

If you like to do sketches check them out. I have used some very old Kaisercraft Papers which where in a prize packet I won last year. I do hope you like what I have done with  the sketch

https://sketchesinthyme.blogspot.com/


MY PAGE:


THE SKETCH:


PRODUCTS USED:

Kaisercraft "Save the Date" Collection:-Cheers Reverse, Milestone, Milestone Reverse and Sticker Sheet
Kaisercraft Orange Alphas
Print Bock Paper Studs
Lime Green Card Stock and scraps of Cream Card Stock
Kaiser Alcohol Markers 37 and 94
2 Crafty Chipboard
Tag from a swap
Uniquely Creative Essential Dye Number 3
Landscape Photo 6" x 4"

CUTTING:

Fussy Cut Pin Wheels from "Cheers" reverse and make  2 large 1 Medium and 1 small using 3 layers and a stud
Cut Milestone 12.5" x 5" x 8.25"
Cut Lime Cardstock 6.25" x 4.25" and 2 x 3.25" x 0.25"
Dye cut the Word strips from the Essential Dye using cream card stock
Colour the circle pieces of 2 Crafty Chipboard using Kaiser markers


ASSEMBLY:

Add the piece of "Milestone" to Milestone Reverse 2"from the to and hard against left hand side
Add Photo to mat of Lime Cardstock 
Add Mat to page using foam tape in middle only
Add the 2 Crafty Chipboard Circle (I have cut mine into Arc ) Underneath  mat of Lime Cardstock 
Add the pin wheels to page as per photo Cutting off the top Right so it fits on page
Add Stickers from the Sticker sheet  to the Dye Cut word sheets using Studs
Add journal tag under bottom left hand Pin Wheel
Add Title as per photo


THANKS FOR STOPPING BY
KEEP SAFE AND WELL
HAVE A CRAFTY WEEK
MAUREEN


Saturday, 19 December 2020

Joy

 Morning all


It's a muggy day again today  humidity is 77% , it was 26 degrees at 8.30 a.m. this morning.

Very overcast and looks like rain. We will wait and see.

This morning my plan is to do C.S.I scrapbook challenge Case Number 339, I have not completed any  of a their challenges since September.  Now feel able to sit and complete pages

So here is the first case file, No 339. I took my inspiration from the colours, baubles on the tree, the stockings on the mantle piece, a photo of a reindeer and the words in the cross stitch. 

I hope you like my interpretation of the scene

http://csichallenge.blogspot.com


MY LAYOUT:


THE SCENE:


PRODUCTS USED:

Kaisercraft "Christmas Wishes":- St Nicholas, Pearlescent and collectables

Kaisercraft "First Noel" :- Collectables

Dye cuts unknown brands 

Uniquely Creative  Holly Jolly Flairs and Gold Glitter Card Stock 

Starform gold Reindeer Stickers 

Photo 6" x 4"


CUTTING:

Cut Gold Glitter Card Stock 4.75" x 6.50"

Cut "Pearlescent" 4.50  " x 6.25"

Fussy cut Poinsettia from St Nicholas

Fussy cut around Santa and across the tree so that the photo can be tucked in

Dye cut the Words Joy and Santa Sleigh


ASSEMBLY:

Add the piece cut from "Pearlescent" to the Gold Glitter mat

Add photo to mat

Add to  " St Nicholas " 3.75" from the top and 3" from the left 

Tucking the bottom into where its been fussy cut

Add, the Fussy cut Poinsettia,  the reindeer and flairs 

Add the remainder of embellishments as per photo 


MERRY CHRISTMAS 

THANKS FOR STOPPING BY 

HAVE A SAFE AND CRAFTY MONTH 

MAUREEN 


Sunday, 13 December 2020

December 1 Box

 Morning 


Its raining, lovely steady rain.

Today I am blogging about one I did yesterday morning whilst  I had the papers still on my table and a few of last years Christmas photos.

We had visitors most of yesterday afternoon, so did not get a chance to do my blog 

I thought I do Archi scraps challenge

Use Scallops in an interesting way i have used the boarder punch around the page and the polka dot present. The rollover part of the stocking has also been scalloped boarder punched


https://archiscraps.blogspot.com


MY LAYOUT:


PRODUCTS USED:


Kaisercraft "Santa's List" Collection:- Naughty and Nice, 

Kaisercraft "Mint Twist" Collection:-Mint Twist x 3

Kaisercraft " Silent Night" Wrap the Present x 3

Kaisercraft "Peppermint Kisses " Collectables and Sticker Sheet

Sullivan Scallop Boarder Punch

Quill Card Stock :- Lime

Dye Cut Stocking from a swap

Button,  Santa and pearls from my stash

6" x 4" photo


CUTTING:-


Cut Salvage from  "Naughty and Nice 

Cut  Salvage from "Ho, Ho,  Ho" x 3 (Red Stars)

Cut the large polka dot present from "Ho, Ho, Ho "

Cut 3 × .50" x 12" Mistletoe strips from "Wrap the Present" 

Cut 2 x 8" x 1.25" strips from " Lime" Cardstock

Cut 2 x 6.50 "  x 1.25" strips from "Lime" Cardstock 

 Boarder Punch the pieces of Lime Cardstock and Mistletoe Strips

Fussy cut around the bow on the polka dot present


ASSEMBLY:


Add the salvage cut from "Naughty and Nice" to bottom of "Naughty and Nice 

Add the 3 strips of salvage from "Ho, Ho, Ho  to top and left and right of "Naughty and Nice"

Add the 3 boarder punched Mistletoe over the top of the Stars, left , right and top

Add the boarder punched lime piece around the polka dot present

Add present to "Naughty and Nice" 2.25" from the top and 0.75" from the left

Add photo 4.75" from the top and 3" from the left (tucking photo under bow)

Add title from the Alpha's on "Peppermint Kisses" Sticker Sheet

Add remaining embellishments as per photo, adding stocking 3" from the top and 1" from right hand side 


THANKS FOR STOPPING BY 

HAVE A SAFE AND HAPPY CHRISTMAS 

YOURS IN CRAFTING 

MAUREEN 


Saturday, 12 December 2020

Ho Ho Ho, Merry Christmas

 Afternoon all,

Today is cloudy and overcast, its been around 25 degrees so very pleasant.

This morning, i thought i look at White With One challenge . The colour this month is "GARNETT GLOW".

https://whitewith1.blogspot.com

I still had a container of Christmas Dye Cuts on my table, (I took part in a couple of Christmas dye cut swap in October and November ). Had a search through my off cuts to see what I had and the layout came together very quickly.

Hope you love what I completed, as much as I do.

MY LAYOUT:


PRODUCTS USED:

Kaisercraft White and Red Cardstock and Red Glitter Card Stock 

Kaisercraft "Silent Night" Collection:- Wrap the Presents Reverse

Kaisercraft "North Pole" Collection:- Snowball

Kaisercraft "Peppermint Kisses:- Collectables and Clear Gemstones

Lace from my stash

Uniquely Creative:- Enamel Dots White, Red and White string, Red Mirror Board and Christmas flair

Dye cuts unknown brands:- Ho, Ho, Ho and Merry Christmas Word Dyes. Reindeer, Santa Sleigh, Christmas Trees dye cuts

Photo  4" x  4.50"


CUTTING:

Cut "Snowball" in half

Cut striped pattern from "Wrapped the Presents" reverse  4.75" x 5"

Cut 2  x 0.50" x 12" strips of the red with the stitched pattern

Dye cut words , Santa sleigh, Christmas trees and Reindeers from red Cardstock and red glitter card stock 

Dye cut Ho, Ho, Ho from Red Mirror Board.


ASSEMBLY :

Add "Snowball " to White Card stock 1.25" from the top and 0.25" from left hand side 

Add row lace underneath

Add on strip of the Red Stitched Strip underneath lace

Add second strip to bottom of page

Add photo to stripe  4.75" x 5" piece 

Add to page 2.25" from the top and 3.50" from the left

Add three layers of Poinsettia using foam tape. See photo for placement 

Add Dye Cuts, String , Words Pearls and Collectables as per photo 


THANKS FOR STOPPING BY 

HAVE A CRAFTY MONTH 

MERRY CHRISTMAS 

MAUREEN 


Saturday, 10 October 2020

Perfect

 Morning all


Just sharing a layout I completed last Thursday. We had an  NBN outage which meant no internet or TV. Hubby decided that he would play his game on the computer (does not need internet), and so I decided I finish this one and cut some circles for another layout I would do on Friday as it was way too early for bed. I don't normal Scrap after tea,  but since hubby  went thru to the office I thought why  not.

The layout I completed was for ARTastic blog. Entry is made via Facebook

https://artasticchallengeblog.blogspot.com/

The criteria was to use flowers. I also took some colours out of the vase of flowers


MY PAGE :


PRODUCTS:

Kaisercraft "Reminisce" Collection: Distressed, Collage, Posy, Blue Floral, Spring Flowers,  Sticker Sheet, collectables, Acetate Sheet and Pink Pearls.

Scraps of Pink Cardstock

Uniquely Creative Dye 6" x 4"

Photo 4" x 4.50 "

CUTTING:

Cut  "Posy" into 2 triangles 5.50" x 12" x 13.25" for top and 3.50"x 12" x 12.50" for bottom

Cut  2 x 4.75"x 4.25"  from "Collage" 

Cut 2 x 4.75 x 4.25" from the Blue Floral 

Dye Cut the dye (cannot remember the name) from Pink Card stock

Fussy cut 3 flowers from "Spring Flowers"

Fussy cut a few butterflies and leaves from the Acetate sheet


ASSEMBLY:

Use "Distressed " as base add the 2 triangles to top and bottom of page

Add the row of lace from the sticker sheet to the top edge of the bottom triangle

Add the first square from " Blue Floral  2.25 from the top and 2.75" from the left.

With each square tuck some of the acetate sheet the dye cut and the collectables.

Place the next square at any angle and add some collectables or acetate bits until all squares are completed add photo to top square ( see photo for detail)

Add a small cluster of flowers to bottom left hand corner, with some collectables .

Add Pearls. 


THANKS FOR STOPPING BY 

HAVE A CRAFTY MONTH 

MAUREEN WOOD 

Wednesday, 23 September 2020

Create - Play

 Morning all

I just looked at the clock and realised the time, I should be making some morning tea to keep my sugar in check, but this morning has passed me by . I got up at the usual time, so not sure where the time has gone maybe it took longer to finish the layout then i expected 

Its already 24 degrees so going to be a warm day, we had a little rain overnight which is great 

The layout is to enter in to this month's challenge for Kraft+.

http://kraftpluschallenges.blogspot.com

This month it was all about using geometric shapes  the mood board had blues and oranges in it, so have incorporated these  colours.

i have used Hexagons as my major shape  but it also has Triangles, and rectangles.

I do hope you like it


MY LAYOUT:


PRODUCTS USED:

American Craft Indutrial Paper Pack

Kaisercraft "Peachy Keen" Collection   :- Super ( Orange) paper and Kraft Card Stock 

Kaisercraft "Tangello" ink

Uniquely Creative  Wave  Stencil

Uniquely Creative Cut Apart Essential Dye (Hexagons)

Kaisercraft "Alpha's"

Words from my stash

Copper "Wheels  " from  my Stash

Boarder Punched Orange Strip from my Stash 

Photo  5.25" x 4 "


CUTTING:

Cut 3  x 8" x 3" strips from blue colour piece from the Industrial Paper Pack cut 1.50" Fish  tails at one end

Dye Cut 7 of 1.50" hexagon  from "Super"

Dye Cut 5 of 1" hexagons from "Super"

Dye Cut  5 of the 1.50" from "Industrial" Paper Pack 

Dye Cut 4 from the blue section of "Industrial" Paper Pack

Cut photo mats  6" x 4.50 " from "Super"

Cut photo mat 6.25" x 4.75 " from  "Super"

Cut Orange boarder strip 6.25"


STAMPING :

Randomly add  " Tangello"ink through the Wave Stencil on the Kraft Card Stock


ASSEMBLY:

Add photo to  mats

Add the 3 fish tails  with the straight edge on the far right hand edge of the stamped Kraft Card Stock. Leave a 0.75" gap between the top and the fish tails

Add Photo  3.50 " from the top at right hand angles (see photo)

Add the cut triangles from the fish tail to top and bottom of the left handside of the page

Add large Hexagons 0.50"  from the left handside of the page starting o.25" from the top of page

See photo details for title and placement of the remaing "Hexagons"

Add title to the page as per photo

Add remaing emblishments as per photo


THANKS FOR STOPPING BY 

STAY SAFE AND WELL 

HAVE A CRAFTY MONTH 

MAUREEN


Tuesday, 15 September 2020

Design Team Inspirational Post for Happy Craft Challenge September-October

 Afternoon all


Cannot beleive we are around to a new month already. 

Today is such a glorious Spring day, from my craft space , the Jasmine is wafting thru the door and the Petunia are so pretty in their flower box again with a lovely scent from the window.

This morning a friend came for coffee and a chat, nice to catch up

My inspirational post for the new month for the Happy Craft Challenge "Anything  Goes" is flowers for Spring and a photo of my Granddaughter  in early March before the Lockdown.

I do hope it inspires you to create and enter our challenge either by Facebook or via the blog

http://happycraftchallenge.blogspot.com
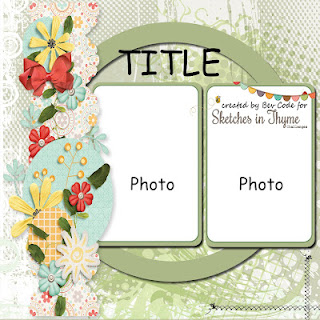

MY LAYOUT:


PRODUCTS USED :

Uniquely Creative "Mother Nature " Collection - Leaves Reverse  Salvage from Leaves, 

EverSelfless, Floral Reverse, Floral, Whats in the Packet, Protective,  Ever Selfless Reverse,

Strong Reverse, Beautiful Soul, Totally Devoted Salvage, Water coloured  Cut Apart Sheet, Cut Apart Sheet and Creative Cuts

Uniquely Creative Essential Dyes No 1 and 3

Uniquely Creative Floral Stencil

Monte Marte Modelling Paste white

Bo Bunny:- Words and Hearts 

Pearls and Muslin from my Stash

Marvy Le Plumell Pens in Pale Blue, Yellow,  Jade Green, and Coffee

Kaszazz Alcohol Markers:- Leaf

Photo 3.50" x 4.50"


CUTTING:

Cut Salvage Strip from "Leaves" and "Totally Devoted"

Fussy Cut Flowers from the bottom of " Beautiful Soul "

Cut the Black and White and the Red Heagons mats from "Strong " Reverse

Cut the Black and White to 4" x 5"

Cut the Hexagon  to 3.75 " x 4.75 "

Cut a 1.50" x 12 " strip  from "EverSelfless, Floral Reverse, Whats in the Packet, Protective, EverSelfless  Reverse, and tear each piece down one side

Dye cut flag strips from Cut A Part Sheet

Using the Floral Stencil and Modelling Paste add to "Leaves " Reverse 4" in from left hand side and 1.50 " from the top. When dry use the Marvy pens to colour as per photo

Fussy Cut leaves from the Watercolour Cut A Part Sheet  and colour  with Kaszazz Alcohol Markers in Leaf

Colour the Bo Bunny Words and Hearts with Jaszazz Alchol Markers

Fussy cut a few flowers from "Floral"


ASSEMBLY:

Using "Leaf" Reverse as your Base add the Salvage Strip from "Leaves "  to the left of the page add the torn strip of "EverSelfless " beside this. Using a strip of tape only on the untorn edge   then tuck under the torn strip of "Floral" Reverse, tuck  the Torn Strip of "Whats in the packet" underneath " Floral "Reverse , tuck "Protective " underneath "Whats in the Packet" then tuck "EverSelfless" underneath "Protective" 

Add the hexagon mat to the Black and white mat add photo to mat

Add photo mat to base of  "'Leaves" Reverse 4.75 " from the top and tucking underneath "Protective " using Foam Tape only in the middle of photo mat ( Photo mat sits 5" from the left)

Tuck Muslin underneath  "Protective" at the top and bottom of Photo 

Tuck the fussy Flower strip from "Beautiful Soul " under the photo mat using foam tape, add extra fussy cut flowers and colour leaves around the large flower strip 

Add some Pearls

Add the fish end strips  tucking them under the Floral strip

Add the hearts  and Creative Cuts as per Picture.

Add title 4.50" from the left and 0.75" from the top


THANKS FOR STOPPING BY 

HAVE A CRAFTY MONTH 

STAY SAFE AND WELL 

DESIGN TEAM MEMBER  MAUREEN 


Saturday, 12 September 2020

I ♡Cooking with my Nan . Maureen W (Aust )

 Hello everyone,

Its the weekend already, where has the time gone this week. I know it has been busy with doctors visits and people in and out.i work best in the morning at present, i get to tired after lunch so usually have a snooze. Yesterday it was our son's birthday. So a late night when i got home i sat in  the chair and was watching T V with a cuppa before i went to bed. I fell asleep in the chair and woke at 1.30 am and got up and went to bed. Feel quite tired this morning. Argh well won't be foing that again for a while


Today i want to share with you an entry i am entering into Let's Get Sketchy, monthly challenge. 

http://letsgetsketchy.blogspot.com


MY PAGE:


THE SKETCH:


WHAT I USED :

Today i am just writing a short description on what i have used.

The papers are freebies from Papercrafter Magazine from 2013. 

They are Bo Bunny. I have used a few bits from them . There where 8 double A4 sheets.

And only had little bit left, no full sheets.

I gave the cardstock a splattered with Gesso to make it look like flour

The wooden Flourishes are from Kaisercraft "Bon Appetiti" Collection

I have used3 x 3" x  5.25" photo's 


I hope you like my layout


THANKS FOR STOPPING BY

HAVE  A CRAFTY MONTH 

STAY SAFE AND WELL 

MAUREEN 


Thursday, 3 September 2020

Trolley Buddies (Maureen W) AUST

Morning all

Its a glorious Spring morning,  our days have started to warm up which is perfect. If we could have these days with a little bit of rain for the garden  I would be a very Happy person.

Today i am sharing a page which i am entering into The Studio Challengs blog.


Its of our Great Grandchildren, these two are cousins, they are a month apart and spend a lot of time together .

This challenge is a SKETCH , love sketches  hope you like my interpretation.


MY LAYOUT:


THE SKETCH:


PRODUCTS USED:

Kaisercraft  "Little One" Collection :- Mia, Jack, Ollie and both the Boy and Girl Sticker Sheet. 
Kaisercraft Peppermint Card Stock and Tangerine Alpha's
Kaisercraft "Peek a Boo" Collection :- Kid 
3 x 4"x 4" photos 

CUTTING:

Cut "Mia"3 x  4.75 x 4.75 
Cut  "Jack" 3 x 4.50" x 4.50"
Cut " Kid" 3 x 5" x 5"
Cut " Kid" Reverse " 5" x 5.75"
Fussy cut Elephants from  "Ollie"


ASSEMBLY:

Use the Peppermint "card stock as your base
Assembly the 3 photo mats using "Kid" as base then "Jack" and then "Mia"
Putting each at a left  hand angle, then adding photo" at right angles
Addto page see placement 
Add "Kid" reverse 6" from the left and 0.50" from the top.
Add stickers, fussy  cut pieces and title to page as per photo 

Thursday, 27 August 2020

Cruise Life

Afternoon all

After a perfectly beautiful morning, its become overcast, hopefully we get some rain, the tank used to water the garden is almost dry.

I thought i use the last photo of our daughters  and family cruise from December 2017  i know  I am  a bit slow in getting these together. The album is now finally finished.

If i do say so my self it does look great

I am entering into C.S.I. Challege Case file 328,on Facebook,  although the challenge information can be found on the blog. My inspiration was the beach theme, brown, pink  and sea shells

http://csichallenge.blogspot.com

For this layout there is lots and lots of fussy cutting, with only 2 x  6" x 12" papers used. 

MY LAYOUT:


THE CLUES:


PRODUCTS USED:

Uniquely Creative "Tropical Dreams" :- Sea Shells, Waves, Ocean  Breeze, Paradise, Creative  Cuts , Lazer cuts' Cut a part Sheet and Sea Wooden Elements.

Kaisercraft rhinestones Clear, Kaisercraft fusion pen BR07

String from my stash

Kaisercraft "Paradise Found" :- Salt Water Reverse 

Brown water coloured paint

Nuvo Mica Spray Gold


CUTTING:

Fussy Cut Shells and Sea Lions from "Sea Shells"

Fussy Cut words and Flowers from "Ocean Breeze 

Fussy Cut large flower clusters from " Paradise "

Cut "Waves" in half 6" x 12" (using top piece. )

Cut "Salt Water"  Reverse  6" x 12" (Using bottom half)

Cut Lazer cut fence in half  paint with brown water colour paint when dry spray with Nuvo Mica Spray lightlly, once dry at some volour using fusion pen BR07


ASSEMBLY:


Tape the pieces of  "Waves" and "Salt Water" Reverse together to form a 12" square

Add photo 3.25" from the top and 4" from left hand side.

Add the fence to left and right hand sides of photo.

Add a large flower using foam tape to top left hand corner tucking the anchor from the Creative Cuts underneath the flower

Add string to two tags

Add tags , fussy cut elements,  Sea Wooden Elements  and Creative Cuts to page, see photo for detail


HOPE YOU ARE ALL SAFE AND WELL

HAVE A CRAFTY MONTH

THANKS FOR STOPPING BY

MAUREEN 


Sunday, 23 August 2020

Trixe and Mum (Maureen W) Australia

 Morning all,

Another windy day, but sitting at dining room table with the sun streaming thru, and thinking about taking my cardigan off as it is so  nice.

Here in the Great Brisbane area, we have gone back to stage 3 lockdown as they have 6 new community transmitted cases yesterday from a 77 year old woman who worked for 5 days whilst contagious before getting a test.( should have know better as she works with  children are my thoughts). Awaiting for the list of places to be announced of where these people went during this time as a couple of them live close by. Its not that i go out much execpt to appointments, but last week was hectic with them.

I shall stop my whinge now.

Today's layout that i am sharing is for Archiscrap monthly challenge  which was a moodboard and to use clocks and gold.

Hope you like my interpretation.

http://archiscraps.blogspot.com/


MY LAYOUT:


THE MOOD BOARD:


PRODUCTS USED:

 Kaisercraft Antiquities Collection:- Valuable, Heirloom Reverse, Antique   Antique Reverse,  Sticker Sheet and the sheet that tells you Whats in the Collection

Kaisercraft Base Coat 1V:- Bricks and Sticker Sheet.

Starfiam Gold Stickers:- Corners, Flowers and Gold Strip's 

Clocks from Kaisercraft Provincial Collectables 

Kaisercraft stitched Square Dye

2 photos 2.25" x 2.50" and 1.50" x 1.50 " 

Kaisercraft Stitched Circle Dye

Kaisercraft gold pearls 


 CUTING:

Cut "Heirloom" Reverse 2" x 10"

Cut "Bricks" 5.50" x 10"

 Cut 2 Strip's from Whats in the Collection 0.75" x 10"

Dye cut 2 x 1.75" circles from Antique and Antique Reverse

Dye cut 2 x 2.25 squares from Antique Reverse

Dye cut  1 x 1.75" square from Antique

Cut  2.50" square frm Antique


 ASSEMBLY:


Use "Valuable" Reverse as Base

Add "Bricks" 3 .25" from left hand side and 0.75" from the top.  Leaving left and right hands free of tape

Add the blue stickers  from "Antiquites" Sticker sheet to "Bricks" 0.50" from left and right hand side of the edges of "Bricks"

Add" Heirloom" Reverse 5" from left hand side  and 0.75" from the top

Using the Strip's of "Whats" in the Collection" tuck them under either side of "Bricks" 

Add the Brown strip as per photo from "Base Coat 1V to the top of "Bricks"

Add Clocks and Photo to mats as per Photo

Add them to page 4.25" from left hand side and tucking them under the clock mats.

Add the blue and brown sticker from "Base Coat 1V to bottom of "Bricks "

See photo for detail

Add title , gold embellishments and pearls


HAVE A CRAFTY MONTH 

THANKS FOR STOPPING BY 

MAUREEN 


Wednesday, 12 August 2020

3! Say Cheese

 Hello everyone,

Such a beautiful day here in Southe East Queensland, the westerly winds have abated and today was 24 degree's with the sun shinning. I had a busy morning with having my eyes tested and a blood test, picked up a few odds and ends , eggs carrots and strawberries. 

I cut all the elements for this one yesterday but did not get sround to posting the challenge is one for "Lets Get Sketchy. Each month they have a sketch challenge.


http://letsgetsketchy.blogspot.com

Here is my take on this months sketch


MY LAYOUT


THE SKETCH:


PRODUCTS USED :

Kaisercraft  "Happy Snaps" Collection  :- Photo Booth reverse, Hot Shot , Say Cheese.

Kaisercraft white and Crimson  cardstock

6" x 4" photo


CUTTING:

Cut "Photo Booth" Reverse 7" x 7"

Cut "Hot Shot" 8"x 8"

Cut Crimson card stock 6.25" x  4.25"

 Cut 2" x 2" piece from"Photo  Booth" add fishtail at one end

Cut 2 x 2" x 2" peice from "Hot Shot  " Reverse add fish tail at one end

Cut Salvage from  " Photo Booth" and "Hot Shot"

Fussycut words and camera from"Say Cheese"

ASSEMBLY:

Using White card stock as base add "Hot Shot" 2" from top and 2.25" from lrft hand side (at an angle, see photo )

Add "Photo  Booth" Reverse 2" from the top and 2.25" from left hand side

Add Photo to Crimson card stock leaving a 0.25" around photo

Add the Salvage 2" from left hand side and 4" from top

Add second salvage 2" from left hand side and 5" from the top

Add words and fussy cut elements as oerphoto

Add Mat to page 2.75" from the top and 4.25" from left hand side at an angle


THANKS FOR STOPPING BY

HAVE A CRAFTY MONTH

MAUREEN