Afternoon all,
It's Friday, where has the week gone, a bit of sunshine today. I did get the washing dry and it's folded and put away.
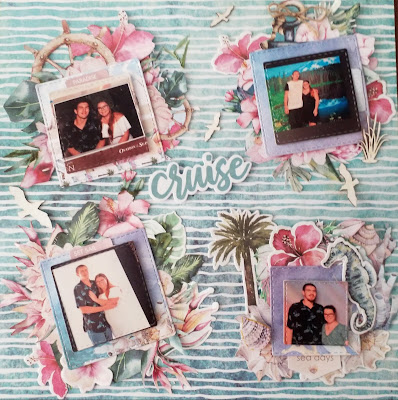
I have been trying to blog this layout for a couple of days, but life and getting a decent picture made it difficult. I did take me a while to think about which photos i was going to use I decided on some very old ones. I have completed quite a large journal on the back of the page, due to the fact of the expansion of time, but thought these photos where right for this layout. I have taken a copy of them as well.
I think i have found a new favourite stencil ( i purchased as a clearance pack 10 for $20.00 it had large 12" x 12" plus the 6" x 6") I love this Cris Cross one
The page is for Scrapbookit blog page:
Think NatureAdd texture, stencil/template, chipboard and circlesHere is the Sketch:

MY INTERPRETATION:
PRODUCTS USED:
Kaisercraft Mountain Air Collection, sticker sheet , collectables, Trunks, Outdoor, Spare Parts (reverse) and Adventure Mocha card stock
Imagnarium chipboard arrows
Kaszazz Alcohol Ink Marker in "Moss"
Uniquely creative Log Dye
Cris Cross Template
Ranger Texture paste
Ranger distress Crayon " Peeled Paint"
Burlap
Photo's 3 x 2.25" x 3.25"
1 x 3.25" x 2.25" (landscape)
"Bracket" Dye from "Outdoors
2nd largest circle from Kaisercraft stitched circles
CUTTING
Dye cut log dye from "Spare Parts" Reverse
Cut 4 x 3..50" x 2.50" from "Adventure (Photo Mat)
Dye cut 3.5" Brackets
Dye cut circle from "Strong Reverse"
Cut Burlap 6 x 4.5" and frayed edges
Fussy cut a section of "Trunks"
STENCIL AND COLOURING:
Coloured 12 arrows using the Kaszazz Alcohol Marker in Moss
Added ranger Distress Crayons in "Peeled Paint' to the texture paste
Applied through the 6" x 6" Stencil to the top left hand corner of the "Mocha" card stock
Repeated process for 3" below and 3" to the right
ASSEMBLY:
Add a fussy cut log to the dye cut trunk , then add a collectable Using foam tape
Add this to the Mocha card stock 2" from the top and 0.50" from left hand side
Add photo to mats
Added Portrait photo mat 4.25" from the top and 0.25" from left hand side
Added bracket 2.75" from left hand side and 2" from top
Added 2nd portrait photo mat 2.75" from left hand side and 53.75" from the top
Added Burlap 3" from the top and 6" from left hand side
Added landscape photo mat sitting it at the end of the frayed left hand side and 6" from the top
Directly above this i have added the portrait photo mat. both added using foam tape
Tucked dye cut logs under neath the "burlap". Tucked the circle dye cut under the portrait and landscaped photo's.
Added embellishments as per photo


Wow you did a great job, it really fits the sketch I can see the resemblance, perfect photos Megan. Xo
ReplyDeleteThanks for joining in, a great take on our challenge.
ReplyDelete