Showing posts with label White with 1. Show all posts

Friday, 4 February 2022

Happiness

 Afternoon all, 

Yet shot and muggy,  we will probably get a storm like yesterday, 

. It started to thunder about 3 : 30p.m. thought I would make coffee just in case the power went out. The thunder got louder and it started pelt down,  raced around and closed the windows and put the jug on, before I got back to make coffee, the power  went off.

It was out for eleven and half hours. The storm didn't bring the humidity or the temperature down . At 10.30 it was still 28 degrees Celsius or 82.4 Fahrenheit Its very dark and gloom now there is a storm looming across now.

Hopefully no power outages today.

I thought I start the challenges off with some that I didn't get a chance to do last month

The first one is for White with 1

https://whitewith1.blogspot.com/

The color this month is shades of Pink plus white.

They do have a mood board as well, I have taken my inspiration from the hearts, Lace skirt, and the frames the different sections of the mood board are in.
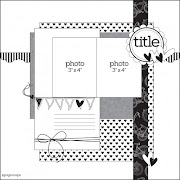


MY LAYOUT:


THE MOODBOARD :


PRODUCTS USED:


Uniquely Creative "Serendipity " Collection:- Happiness Reverse,  Happiness,  Carfree,  Forever Reverse, Blessed and Fortune. 

Kaisercraft  White Cardstock 

Uniquely Creative Lace, Lace leaves, Lace Doily and Dusty Pink Flowers 

Unknown Brand of 7" Doily and Script Paper

Sullivan's Heart Border Punch 


CUTTING:


Cut a 10" square from middle of  "Happiness "

Cut White Cardstock  to 11.50" square

Cut a 6" Circle from Script Paper 

Cut 6" x 12" piece from " Carfree"

Border punch all 4 sides

Cut a 6.50" x 5" from "Carfree"

Cut a strip from "Forever " Reverse 1.25" x 6.50" 

Border punch one side

Fussy cut flowers from Blessed and Fortune

Cut Circle and Doily in half


ASSEMBLY :

Use "Happiness " reverse as base

Add white card stock leaving a 0.25 " all the way around

Add "Happiness " Reverse  leaving a 1" border all the way around 

Add " Carfree " taping down top only 3" in from left hand side and hard against top 

Add a the cut circles together cut doilies. 

Tuck under pieces of "Carefree " 2.50" from top 1" from  bottom 

Tape down "Carefree" over doilies

Add strip from "Forever" Reverse down right hand side of photo mat

Add lace to bottom of photo mat

Add to page 2" from  the top and 2" from the left hand side 

Add clusters as per photo

Add photo


THANKS FOR STOPPING BY 

HAVE A CRAFTY DAY 

MAUREEN

Wednesday, 10 March 2021

Family

 Afternoon All


Another beautiful morning with a little rain overnight, tops of 30 degrees today, that's fine no humidity. Its so lovely we have been out this morning , I was using my scan and cut to cut some items for my Easter journal swap, I need to change the depth of the needle, but the plastic holder fell apart . I expect I cannot make it last for ever. I goggled the availability of a new one to buy.  It told me I would be able to get one at Mt Gravatt rang the store , yup they said and so off we went. When we got to the store it was not the correct one it had three holes in the bottom of it  and was a lot narrower than mine, Then went and got some cheap fuel  $1.19.5 a litre and came on home. Although we did buy a frame which was marked at $16.50 less 30% but docket shows it went through at $3.50. the girl was adamant the price was right. Cheap large  Photo frame.

Before I went out this morning I did the challenge layout for White with I , the colour this month is Ultra Marine. with either Stripes,, buttons or Bows. I have used all three on my page

https://whitewith1.blogspot.com/

Late last week when I was searching for some Striped papers I came across some "Bella" papers that are perfect for this challenge. 

I hope you like what I have completed


MY PAGE:


PRODUCTS USED:

Bella Paper Fusion:- Spotted, Striped, Spotted reverse, and Stripes Reverse

Buttons, Rhinestones, lace flowers, cotton and white lace, 6" and 0.25" ribbon tied into a bow  from my stash

Uniqolour Water Coloured Makers and White Water Coloured Card Stock scrap of white water coloured  card stock

Sullivan Flower Punch in small and Medium

Photo 5.00" a 2.75"


CUTTING

Cut two triangles 4.75" x 4.25" x 4.75" from Striped Paper

Cut 6" x 4.25" from "Spotted" Reverse

Cut 4.75" x 4.25" from "Spotted"

Cut 5.25" x 3.75" from "Stripes"

Fussy Cut Flowers from " Stripes Reverse"

Punch 3 small flowers and 2 Medium Flowers from scraps  of white card stock


ASSEMBLY:

Add the Triangles to top left and Bottom right of water coloured Card Stock

Add "Spotted" paper 3.25" from the top and 1.50" from left hand side

Add "Spotted" Reverse 4" from the top and 1.75 from left hand side

Add "Stripes" 3.25" from the top and 2.25: from left hand side

Add a row of lace at the bottom of "Stripes"

Add Photo 4.75" from the top and 2.50" from left hand sider

Create a flower cluster at the bottom right hand corner of the photo, using lace flowers, fussy cut flowers, white flowers punched, buttons, cotton, rhinestones and bow

Add the remaining embellishments as per photo. Splatter Marine coloured Paint on page


THANKS FOR STOPPING BY

HAVE A CRAFTY MONTH

MAUREEN

Monday, 22 February 2021

My Pet

 Afternoon guys


Its been a very warm day 35degrees Celsius  and only getting Hottentot the remainder of the week. In a way I can say I will be  in and out of air-conditioned places thus week extremely busy.

I started this one early in the month and it got buried under a pile of other things   thankful I found it when I was checking off February Challenges and realised I had not entered.

The colour is piggy pink and the sketches this year are mandatory. 

I hope you like my interpretation 


THE PHOTO :


THE SKETCH:


PRODUCTS USED:

Kinder Creations Chipboard Heart  

Kaisercraft White Paint

Close to My Hear "Bashful" Ink

Uniquely Creative:- "Serendipity" Collection :- Carefree  

Uniquely Creative 14  " White Lace and White water colour card stock 

Sullivan's Heart Border Punch 

 Uniquely Creative "Winter Rose " Collection:- Imagine, Let it Snow, and cut apart Sheet

2 x 4.50" x 3" Photos

Flowers from my Stash

Grant Studio  Alphabet Stickers 

Kaisercraft  Alphabet Stickers

Uniquely Creative Heart Dye


CUTTING:

Cut 2 x photo mat's  from "White" Water colour Card Stock  4.75" x 3.25"

Cut a tag from "White" Water Colour Card Stock 3.75" x 3 1/8 "

Cut 6" x 6" square from White Water Colour Card Stock

Dye  cut Heart  from "Let it Snow "Reverse 

Cut 4.50" x 1.50" from "Imagine"


ASSEMBLY:

Paint the chipboard with white paint two coats

Edge all cuts pieces with "Bashful ink

Border punch the tag and "Imagine"

Add the piece of lace to top of "Carefree"

Add photos to mats

Add the 6"square of water colour card stock to  " Carefree" 2.50" from the top and 5" from left hand side

Add photo mats 0.25" from left hand side and 2.50 " from the top

Add second one below first one

Add "Imagine" 2.59" from the top and 1" from right hand side

Add tag 1.75" from the top and hard against photos

Add flower cluster to top of tag

Add title below

Add Chipboard Heart 5.75" from the top and 0.25" from right hand side 

Add the dye cut heart inside the chipboard Heart 

Add the word "Gorgeous" above first photo


THANKS FOR STOPPING BY

STAY SAFE AND WELL

HAVE A CRAFTY WEEK

MAUREEN


Tuesday, 6 October 2020

LOVE THIS

 Good Morning,

Cannot belive its Tuesday,  the kids are walking to school, the first bell has rung. So for the rest of the term i can tell what time it is during the day, so i remember to eat so my sugar does   not do a dive.

I completed this challenge page yesterday to entering into the "White with One" challenge the colour choice this month is "Kelly Green" there is a sketch as well you don't have to do the sket h if you don't want to , but i have.

On last months challenge i received a comment from White with 1, that i must be the Queen of flower clusters, as i always have a clusters of flowers. This layout is no expection. Although when i chose the photo i wasn't going to  but when i had the layout together it was calling me to add some.

I hope you like my layout which I am entering into the White with one Facebook Challenge


https://whitewith1.blogspot.com/


MY PAGE:


 THE SKETCH:


PRODUCTS USED:

Kaisercraft " Limelight" Collection: Bright, One's Journey, Vibrant,  Sticker sheet and Collectables

Kaisercraft White Card Stock, plus scraps Green ink, Stitched Circle Dye

Sullivan's Boarder Heart Punch

Uniquely Creative Tag dye and  Clear Rhinestobes

Debbie Moore Designs . Butterfly Stamp 

String and flowers and leaves  from my stash


CUTTING:

Cut "Bright", 12" x 6"

Cut "One's Journey " 11" x 5.75"

Cut "Vibrant" 5.75" x 6.50"

Cut Photo Mat 6" x 4" from White Card Stock  and punch the 6" side with Heart Boarder Punch

Dye Cut 1.75" circle from White Card Stock 

Dye Cut Tag from White Card Stock  1.25" x 2.75"

Create an envelope from a piece of White Card Stock 4.25" x 4.25 "

Stamp Butterfly using Green Ink on to White Card Stock

ASSEMBLY:

Add "Bright" to White Card stock 1" from top

Add "One's Journey " 0.50" from left hand side  and 1.50" from the top leave bottom untaped

Add rounded sticker from sticker sheet to "One's Journey "

Add "Vibrant " tucking it under "One's Journey" 1" from left hand sude and 4" from the top

Add Photo mat 4" from top and 2" from left hand side

Add photo 2" from left hand side and 4.50" from the top,  using foam tape  leaving right hand side so that the tag and envelope can be tucked under

Tuck Tag and Envelope under Photo ( i had journalling and added to envelope)

Add String to tag

Add title to dye cut fircle

Add the white butterfly from the collectables to stamped butterfly 

Add cluster of flowers to bottom right corner ysing leaves from collectables and flowers from my stash


THANKS FOR STOPPING BY 

HAVE A CRAFTY MONTH 

MAUREEN 


Sunday, 6 September 2020

Blessed

 Morning all, 

Happy Father's day , to all thoes  Dad's out there in Australia.

Its a beautiful day , its overcast but already 17 degrees, there is a slight breeze , have the windows  open throughout the house.

Today i want to share a layout i finnished yesterday to enter into the "White with One" Challenge. The colour this month is Mandarin "

https://whitewith1.blogspot.com

My colouring or my boarder punching is not crash hot, i have never been one to colour between the lines even as a child.


MY LAYOUT:


THE COLOUR:


PRODUCTS:

Brazzill White Card Stock 

Anko Texture Mandarin Card Stock 

Uniquely Creative Water Colour Card Stock 

Uniquely Creative " Mother Nature fussy cut Florals reverse, Cut apart Sheet, Water coloured printout, and Creative Cuts

Uniquely Creative "Blessed" Dye small

Sullivans Boarder punch

White and orange flowers from my stash 

Cotton and cheese cloth from my stash

Anko 6.5 " doily

Uniquely creative Square Doily 

Kaisercraft  Pearls1.50

Glass butterflies,and Brads from my stash 

Touch new G Gel white pen

Kaiser fusion pen OR03

PHOTO 3.25" X 4.25"


CUTTING:


Cut 5.50" circle from  "Fussy cut florals" Reverse

Cut 1.50" from side and top of White card Stock 

Boarder punch white card stock

Fussy cut flowers from the Water colour printout

Dye cut "Blessed" from water colour card stock

Cut words from cut apart sheet

Cut 3 x   1.50" x  0.50" add fish tail at one end from the orange tag in the Creative Cuts

Colour fussy cut flowers and dye cut word using Fusion ORO3 pen. 

Add colour to leaves


ASSEMBLY:


Add white card stock leaving a 0.75" boarder of Mandarin card stock

Add photo to rectangular doily

Add the piece of "Fussy cut Florals" Reverse to large Doily 

Add the photo with photo mat to "Fussy Cut Florals Reverse"

Add Doily to page 4" from top left gand corner and 1.25 from left hand side

Add dye cut title to top of page

Add flower cluster,using  flowers, fussy cut flowers butterflies, cotton, words fish tail strips  and cheesecloth to bottom right hand corner (see photo for further detail )

Add the  manadrin strips as per photo add journal


HOPE YOU LIKE MY PAGE 

HAPPY CRAFTING

BE SAFE

MAUREEN


Sunday, 9 August 2020

Love This

 Morning all 

Over the last few days i have been working on my entry  for  White with One.

The colour this month is "Daffodil, with an optional Sketch. Very little of this colour in my stash so have used a stencil with both modelling paste and ink to achieve the effect i wanted. 

I hope you like my page and it meets criteria.


https://whitewith1.blogspot.com


MY PAGE:


THE SKETCH:

August Sketch


THE  COLOUR :


PRODUCTS USED:

Kaisercraft  2x white card stock 1 x Lemonade Card Stock

Kaisercraft "Crafternoon"  Collection:- Crafty and Measured Reverse

Kaisercraft " Golden Grove" Collection:- Grateful and Sticker Sheet

Sullivan's Flower 1.50 " punch, Flower punch 1", Heart Punch 0.75 ", and Heart boarder Punch.

Kaisercraft 3 " oval Dye and 1.25" circle dye

Uniquely Creative "Small Paint Strokes" Stencil

Close to My Heart "Lemon " stamp  ink

 Modelling Paste, pearls flowers   and 7" white Grow Grain Ribbon. 

2 x photos 3" x 4"


CUTTING:

Cut Lemonade card stock 7" x 11"

Cut White card stock 7" x 7.5"

Cut Crafty 8" x 5"

Cut Grow Grain Ribbion @ 5" and second length 2.5"

Punch 3 x 1.50" flowers from "Crafty"

Dye  cut 3 x 1.25" circle from White Card Stock

Punch 2 x 1" Circle from "Crafty"

Punch 2 hearts from White Card stock

Dyecut 3" Oval from "Measured Reverse"

Punch 5" strip using Hearts Boarder Punch

STENCILLING:

Using Lemonade Card Stock, Small Paint Strokes Stencil  with Modelling paste cover 7" x 11" card stock

Using the 7"   7.5" White card stock   Small Paint Strokes Stencil and "Lemon" ink cover card stock.


ASSEMBLY:

Add pieces of Lemonade card stock which has been stencikled  1.5" from the top and 2.75" from left hand side

Add white card stock which has been stencilled 2.50" from the top and 1.50" from left hand side

Add strip  from  "Grateful"  8.50" from left hand side, vertical down page

Add "Crafty" 2.25" from the top and 1.75" from left hand side 

Add Heart boarder 1.75" from left hand side and 6.25" from the top

Add First photo 2" from the top and  2.75" from left hand side

Place second photo beside First

Add the long piece of grown Grain Ribbon 1.75" from left hand side and 10" from the top

Add small piece 2" from the top and wrap under back of page

Add oval with journalling  2.75" from left hand side and 7.25" from top

Add remainder of embellishments and title as per photo


THANKS FOR STOPPING BY 

HAVE A CRAFTY MONTH 

MAUREEN 

Tuesday, 5 May 2020

Hi.

Morning all,

Its another beautiful day here, only another day to wait for my knee replacement, although i will post this whilst i recoup as trying to make sure i have at least one or two post on my blog  whilst in hospital

Yesterday i dye cut all my pieces and this morning put them together. I decided to use Liquid Pearls straight on to my page not something i do normally but i only had a few smudges which makes me happy
Then i went to photograph it and found it had no title , forgot it
The layout, is a simple one, the longest time was finding the correct colour paper
I then remember i was given this stack of 6" x 6" paper single sheets of various colours. Yup i had enough to make my design work.
The layout is for White with One face book group the Colour this month is "ICE BLUE "
Hopefully my colour fits the bill


MY LAYOUT:


PRODUCTSUSED:

Kaisercraft white card stock plus scraps
Kaisercraft " Lullaby Collection:- Hush Little Babu
Mintay "Dreamers Collection:- MTDRE. 09, MTDRE. 06
Grants Archival Card Stamp and Scrap Paper Pack
Uniquely Creative Succulent Outline Dye
Uniquely Creative Doily Element Dye
Ranger Liquid Pearls "Robins Egg"
Kaisercraft Alph's
Stork from my stash
Ribbion flower from my stash
Photo 2.50" x 2"


CUTTING:

Cut 2 x 3.50" x 1.150" from "Hush little Baby"
Cut fish tail in both ends
Dye cut 4 x Hanging Peony" part of the "Succulent" outline dye from blue
Dye cut large flower from the "Succulent" outline Dye in blue
Dye cut "Doily Element "  in blue and White
Fussy Cut frame from MT DRE.06
Fussy Cut Bird from MT DRE . 09
Cut out inside of frame

ASSEMBLY:

Add "Hush Little Baby" 2" from the top and 4.75" from left hand side
Add second piece 2" from the bottom using
Add photo to frame
Add Doily element dye cuts to frame as per photoAdd frame to page 4.25 from left hand side and 3.25 from top. Using foam tape
Add Succulent dye cut under frame to bottom left
Add white flower and dye cut bird
Add ribbion flower to top of fish tail
Add title
Place a dye cut hanging penoy in each corner
Add liquid pearls to top and bottom of page


THANKS FOR STOPPING BY
HAVE A CRAFTY MONTH
MAUREEN

Tuesday, 28 April 2020

Vroom Vroom

Morning all


Today is just a beautiful  lovely clear day after a cool  morning.

Next weekend here in Queensland they going to start relaxing some of the stage three restrictions. We can bushwalk, fish, jet ski , go to the beach as long as we social distance ourselves, have 10 people at a gathering (just in time for Mothers Day) and go shopping for non essential items.
Hopefully we don't have too many new cases with the lifting of restrictions so we can fully lift restrictions

Today's post is the third and last challenge. It is a blind crop or a step by step
Way out of my depth with this one, used Red, which looks like pink , split the gesso on the photos, it was one diaster after another one.

The instructions are provided by Theresa a Design Team Member of White with 1.


MY TAKE:


PRODUCTS:

Kaisercraft  3 X White Card Stock
Gesso
Distressing tool
Kaisercraft "Grid Texture" Stamp, Arrows and Alpha's Dyes
Sullivan Red Card Stock 3" x 12" used for embellishment
Bentoto House Red stamp Ink
Uniquely Creative Uniqolour Red watercolour pens
2 x 3.75" x 5" photo's
Tyre and wheels dye from a paper craft magazine

Instructions:

 Please use a 12x12" white cardstock as your base.

Chose 1 colour which is the only one you will use in this challenge.
Using the 1 colour of your choice splodge your base cardstock.
(Splodging - using a plastic bag apply ink, spray or paint to one side, spritz with water.)
Put you hand one  side and randomly pat this over your base page.
Using 2 photos trim them to a suitable size.
 Edges with some gesso on your finger.
Cut 2 Matts for each photo 1/4" bigger each layer.
First layer ink the edges and randomly stamp a texture stamp over it
2nd layer attach foam tape or thick card stock to the back for some dimension.
When the gesso is dry attach the photos to the layers.
Randomly stamp the page base with appropriate stamps for your layout.
Using white card stock cut into varying widths, 1/4", 1/2", 3/4" and 1" any length is fine.
Distress the edges of these strips.
Stamp some with stamps. Splodge some with leftover ink.
Leave some white.
Place the photo matts on your page where you wish and lightly trace around them, then remove the photos.
Attach your created strips randomly around the traced frame, doubling some up, varying finishing lengths and sizes.
Add a title.
Attach some embellishments in the colour chosen for your page.
it is done!


Thank you all for looking
have a crafty day

Monday, 27 April 2020

Time

Morning

This is the second Challenge for White with One,  Cyber Crop week end.

White with one hold monthly chhallenges as well 

Make a layout and a Bonus Card using a Grid Pattern in  Blue an 70% White

https://whitewith1.blogspot.com/


MY PAGE:


MY CARD


PRODUCTS USED:

Kaisercraft Ocean, Blue and White Card Stock 2 Sheets of each
Kaisercraft "Peek a Boo" Collection": - Bambino Reverse and Kid
Kaisercraft Thob watch, and Butterfly dye  4", 3" and 1.50" Stitched square dye
Kaisercraft "Paradise Found" alpha's
Kaisercraft "Dot" Embossing folder
Flower embossing Folder from my stash
Flowers from my Stash
Kaisercraft Rhinestone and Pearls in White Blue and Silver
Photos 6 x 3.75 x 3.75
Photo 1.75" x 2.50"


CUTTING:

Dye Cut  5 x 4" squares from "Ocean" Card stock
Dye Cut 4 x 4" squares from White Card stock
Dye Cut 3 x 1.50" squares from "Ocean" Card stock
Dye Cut 3 x 1.50" squares from "White" Cardstock
Cut a 3.25" square from "Kid" with image at bottom left
Dye Cut 3.25" from "Bambino" Reverse" 
Emboss all 1.50" squares using Dot embossing Folder
Dye Cut 2 Butterflies from White card Stock
Cut Card Base 9.5" x 6.5" from Blue card Stock.
Score in the middle to form card
Emboss Card Front using Flower folder

ASSEMBLY  - LAYOUT:


Using white cardstock as your base add your 4" squares to the base.
Row 1 across the page is blue  white, blue
Row 2 across the page is white blue, White
Row 3 across the page is blue, white blue
Add Photos to each of your squares
Add dye cut to middle square of top row
Add the piece cut from "Bambino" Reverse to the middle bottom row
Add the dye cut piece from "Kid" add the 2.50" x 1.75" photo to "Kid"
Add the embellishment as per photo


ASSEMBLY - CARD:

Add to the embossed front
Row 1: Ocean blue then White
Row 2:  White then Ocean Blue
Row 3: Ocean Blue then White
Leaving a 0.25" gap
Add flowers, butterflies, Pearls and Sentiment as per photo


THANKS FOR STOPPING BY
HAVE A CRAFTY WEEK
MAUREEN

Sunday, 26 April 2020

" Dream"

Morning All,

Over this weekend White with one have been holding a cyber crop weekend with challengesTape and games on their face book page. They have three challenge all have to have at least 70% of white plus one other colour


The first challenge requirements are:

  1.  Use your Favourite colour
  2.  Use three or more flowers
  3.  One picture
  4.  4 Patterned papers
  5.  Washi  Tape
  6.  White 70%


MY PAGE:


PRODUCTS USED:

Kaisercraft "Lime Light " Collection:- Bright Reverse, Vibrant, Ones Journey, Today, Collectables
Kaisercraft White Card Stock and scraps of White Card Stock
Sullivan's flower punch in 0.50" and 1"
Kaisercraft Rhinestone Silver
Kaisercraft "Apple Mist" 


CUTTING:

Cut "Bright Reverse" 8" x 12" and tear top and bottom
Cut "Vibrant" 7.50" x  12" and tear top and bottom
Cut "Ones Journey" 7" x 12" and tear top and bottom
Cut "Today"  4  x 2" x 4"
Cut 6" x 4" photo Mat from white card Stock
Punch 5 x 1" flowers and 1 x 0.50" flowers


ASSEMBLY:


Using White Card Stock as base Add "Bright Reverse" 8" x 12", 2" from the top
Add "Vibrant" 7.50" x  12", 2.25" from the top
Add "Ones Journey" 7" x 12", 2.50" from the top
Add "Today" 1.50"left hand side and 4.50" top 
Overlap "Today" 2" from the top and x 4.50" from the left hand side See Photo
Using the other two pieces of "Today Place one 4.50" from the top and 2" from the Right hand side
Add  second piece add and 2" from the right hand side and 4.50" from the top
Add  second piece add 2"  from the right hand side and 5.50"" from the right hand side
Add photo to matt of white card stock add to page 4" from the topand 2.50" from left hand side  
Add Washi Taper on top and bottom of photo
Add Title
Add flower cluster, pearls and other embellishments as per photo
Splatter with  Kaiser mists


Monday, 6 April 2020

Sweet

Morning all,


Didn't get finished yesterday afternoon, got too tired.
Its a beautiful morning a litte cool earlier on.
This one is "White with One", sometimes i find this is a bit hard trying to get colours to match but love the challenge.  This month the colour was LIME CHASER:
Did not quite use the sketch but i love what i hace completed


MY PAGE:


THE COLOUR:


PRODUCTS USED:

Kaisercraft "Tea Party" Collection:- Rasberry Tart reverse,Peppermint,  Peppermint  reverse,  
Green strip from my stash
Kaisercraft White card stock and scraps of card stock 5" x 12"
Fiskars Boarder punch
Home sweet Home lace , it still had " on it so had it for quick some time
Kaisercraft Butterfly and Doily Dyes 
Kaisercraft  Rhinestones wooden flourishs and White Alphas
Flowers and Star from my Stash
White Gesso
Cheese clothcloth
2 white 1" Circles from my stash that had been cut in half


CUTTING:

Boarder punch  2 pieces of 1.50" x 12" at one edge
Tear 2 strips of "Peppermint"  2" x 12" see photo
Cut "Rasberry Tart" reverse 6" x 12" and 3.75" x 4.50"
Cut "Peppermint" 5.50" x 3.75"
Cut Stripe piece  6" x  4" 
Cut "Hearts" peice from Peppermint " Reverse 5.50" x 3.75
Dye cut 2 doiles and 4 butterflies from scraps of white card stock
2.50" 
Paint wooden flourishes with white Gesso

ASSEMBLY:

Add "Rasberry Tart" 6" x 12"  to the white card stock 3" from the top taping in the middle only
Tuck the white Boarder punch piece under top and bottom of " Rasberry Tart"
Tuck the torn pieces of " Peppermint " under top and bottom under the boarder piece
Tuck the lace under the torn edge (see photo for detail)  
Add the strip piece 4.25" from the top and 0.25: from left hand side
Add photo to mat of Peppermint"
Add to page 2.50" from the top and 0.35" from the left hand side
Add heart piece 2.25" from right hand side and 3" from the top
Add photo to mat of Rasberry Tart Reverse add to page 4" from the top and 0.25 from right hand side 
Add emblishmentsas per photo 


THANSKS FOR TAKING THE TIME TO STOP BY
HOPE YOU LIKE WHAT YOU SEE
HOPE YOUR ALL WELL AND SAFE
CHEERS MAUREEN

Thursday, 24 October 2019

"Be Happy" Maureen W (Australia)

Morning All,

Lovely day here , should have blogged these two layouts at  the end of last week , but not feeling 100% and not able to sit for long

Today's layout is for  https://whitewith1.blogspot.com/
 It was to use Citrus Combo plus sketch (Sketch not Compulsory)


MY LAYOUT:


THE SKETCH:

October Sketch


PRODUCTS:


Kaiser fusion pen Y13
Kaisercraft "Speckles" Template
Kaisercraft White card stock  and scraps of Mustard and white  card stock
Kaisercraft Paisley Days Sticker sheet
White lace flower from my stash
Kaisercraft wooden flourish flowers
Kaiser Dye cut shapes
Photos 2.75" x 3.5" and 2 x 2.75" x 3" photo
2 white flowers from my stash
Decoupage Dogs on mat from my stash


CUTTING:


Dye cut tag  2" x 1.25" from white card stock
Dye cut tag 2.25" x 1.50" from Mustard Card stock
Cut a Square of Mustard card stock 6" x 6"
Cut a 3" x 3.75" white card stock (Photo mat)
Colour wooden flourish with  Kaiser fusion pen Y13


ASSEMBLY:

Add Sticker from the  "Paisley Days" Sticker sheet (0.25" x 12") 3.50" from the top running vertically across the page
Add the template  underneath sticker across the page 4" x 12" using Kaiser fusion pen Y13
Once Dry add the Mustard card stock 6" x 6" 0.25" from the left hand side at an angle check photo
2.25" from top at far right
Add the 2.75" x 3.5" photo to white photo mat
Add this mat to page leaving right side with no tape 1.50" from the left and 3.75" from the top at an angle
Add the two smaller photos with no mats 4.25" from top and 5.25" from left hand side
Add white dye cut tag to the mustard dye cut card add journal  add to page (check photo for placement)
Add embellishments as per photo
Mist with some water mixed Kaiser fusion pen Y13


Wednesday, 11 September 2019

That Face, (Maureen W) Aust

Hi Guys

Last post for today,  This is the White with 1 challenge which is White plus the colour of the month which is use the colours of the rainbow with white.
It is good that I am getting back into doing pages again


This month their where two different blogs using rainbow colours in their challenge pages
I did do another page but realise when i finished their was not much white to it, so decide i would have another go. 
I have used little paper My photo mat and butterflies were cut using scraps of card stock leftover from the other challenge and the Title  is some stickers that i had in my stash, brand unknown
Hope you like it, as my stencilling did not go to plan


MY PHOTO:


PRODUCTS USED:

Kaisercraft White card stock
Kaisercraft pearls in red, orange, yellow, green, blue, indigo and purple
Scraps of card stock in red, orange, yellow, green, blue, indigo and purple to cut butterflies
Sullivan's butterfly punch
Kaszazz alchol markers in :- red, orange, yellow, green, blue, indigo and purple to cut butterflies
Hydrangea Stencil (brand unknown)
Moulding paste
Alpha Stickers (Brand unknown)
Photo 5" x 3"

CUTTING:

Punch out two butterflies of each colour using scraps
Cut a  indigo scrap piece for photo mat 5.25" x 3.25"


STENCILLING:

Using the white  moulding paste and stencil to complete an oval shape in the middle of the white card stock
Once dried colour with Kaszazz alchol markers 
Add further  stencilling at each corner using Kaszazz alcohol markers 

ASSEMBLY:


Added photo to mat
Added photo mat to page 4" from the left hand side and 3.50" from the top
Add butterflies using form tape to look like they circling the photo (see photo for placement)
Add gems to middle of each butterfly
Added title  (see photo for placement)


Thursday, 8 August 2019

Family (Maureen. W) Aust

Morning all,

On this absolutely beautiful day in South East Queensland, after a heavy mist this morning out come the sun and is a perfect day. Although we are suppose to be hit by a cold front and westerly winds, but that is the norm. Its show time and it is usually cool and windy.

I haven't done a White with 1 Challenge since May due to my fall, still recovering slowly and this has taken be a few days. Sitting for long is still a nightmare.
There challenge was to use light and dark Purple
My cardstock looks Mauve in the picture but it is white

https://whitewith1.blogspot.com/

MY INTERPRETATION:


PRODUCTS USED:

Kaisercraft La DI Da Collection:- Haze
Kaisercraft  Lavender Haze Collection:- Thistle
Kaisercraft White card stock  and scraps of White card stock
Kaisercraft White Alpha and nesting Dyes
Flowers in white and purple from my stash
Moulding paste
Stencil from my stash
Sullivan flower boarder punch
Brad , rhinestone and bow from my stash
Kaisercraft  White Shimmer mist
Uniquely Creative feather Dye
2 x 3" x 3.5" photos


CUTTING:

Cut "Hop" 7.75" x 6.75"
Cut "Hop" 6" x 4.75"
Cut "Thistle" 6" x 12"
Dye cut Feather from scraps of White card stock
Dye cut small oblong from scraps of White card stock
Boarder punch  "Hop" on the 6.75" on both left and right hand side
Boarder punch "Hop" on the 6" side of second cut piece top and bottom. (see photo for details)
Using stencil and modelling paste add corners to the white card stock
Add large floral stencil to bottom of  "Thistle" 1" from the bottom using modelling paste

ASSEMBLY :

Add "Hop" to white card stock 2.50" from the top and 1.75" from the left hand side
Add  "Thistle" 3" from the left hand side. (See photo for details ).
Add the photos to mat of "Hop" leaving boarder exposed,
Add the photo mat to page 3.75" from the top (see photo for further details)
Add Title 1" from the top and 3.75" from left hand side
Add Embellishments as per photo
Spray with Shimmer Mist (cover photo.before spraying)


Friday, 5 April 2019

Cousins (Maureen W) Aust

Good Morning all

Its a bright and cheerful sunny day, with an expected warm weekend, here in the South East. Beginning of school holidays, so hopefully it will be fine and warm for the next two weeks.

Today's post is the challenge layout for White with 1. The colour this month is Pink , plus they have a sketch as well.

https://whitewith1.blogspot.com

The photos are of our great grandchildren, the two Little's are a month apart.


THE COLOUR:


MY INTERPRETATION:


PRODUCTS USED:

Kaisercraft "Lavender Haze":- Jacaranda, Wisteria, Mulberry,
Kaisercraft white card stock, and scraps of white card stock
Kaisercraft Lace Tag dye
Ksisetcraft Pink ink
Kaisercraft,  Pink Rhinestones and White Pearls
Little Birdy Classic Elements :- Alpha
Large white Doily
White ribbon 0.25" wide  2" long
Craft Stall plywood Embellishments
2 x 2 .50" x 3.75" photos


CUTTING:

Cut 6" semi circle from "Jacaranda" include the white wording
Fussy cut Flowers from "Mulberry"
Cut 6.75" x 6.75" square from top of ""Wisteria"
Cut  3.5"x 1" strip out of the pink of the "Wisteria"
Cut 2" x 1" from the pink part of "Wisteria"
Cut  4" x 6" rectangle from white card stock
Dye cut  tag dye from "Wisteria" Reverse  cut it down to 3.25" x 1.75"
Colour wooden embellishments with pink ink


ASSEMBLY:

Add semi circle cut from "Mulberry" to Doily leaving the white lace part visible
Add title letters to 3.5" x 1" strip
Add date to the 2" 'x 1" strip
Add photos to white card stock leaving a 0.25" gap at the top and between photos
Add journal to tag
Add 6.75" square to white card stock (do not tape the right hand side )
2.25" from the left and 2.75 from the top
Add semi circle by tucking it under the rectangle glue into place
Add white photo mat  3.25 from top and 1.75" from left hand side
Add journal tag 5.75" from the top and  5.75" from the left
Add small rectangle with the date 3" from the left and slightly tucked under the large rectangle ( see photo)
Add title rectangle 2.50" from the top and 5.75" from the left
Add fussy cut flowers to the left of photo mat
Add pearls and rhinestones as per photo
Add wooden flower and word as per photo